


Les Paul Refinish & Relic
I first stripped and refinished this guitar a decade ago. It’s a 1983 Greco Mint Collection made with a leftover Super Real neck that I bought as a husk back in the days when you could pick these up for about £300. It was my first attempt at a Burst-style refinish and for a long time I’ve been feeling I could do a better job.
Having learned a few new skills in the past few years, I’m going to take things a bit further.
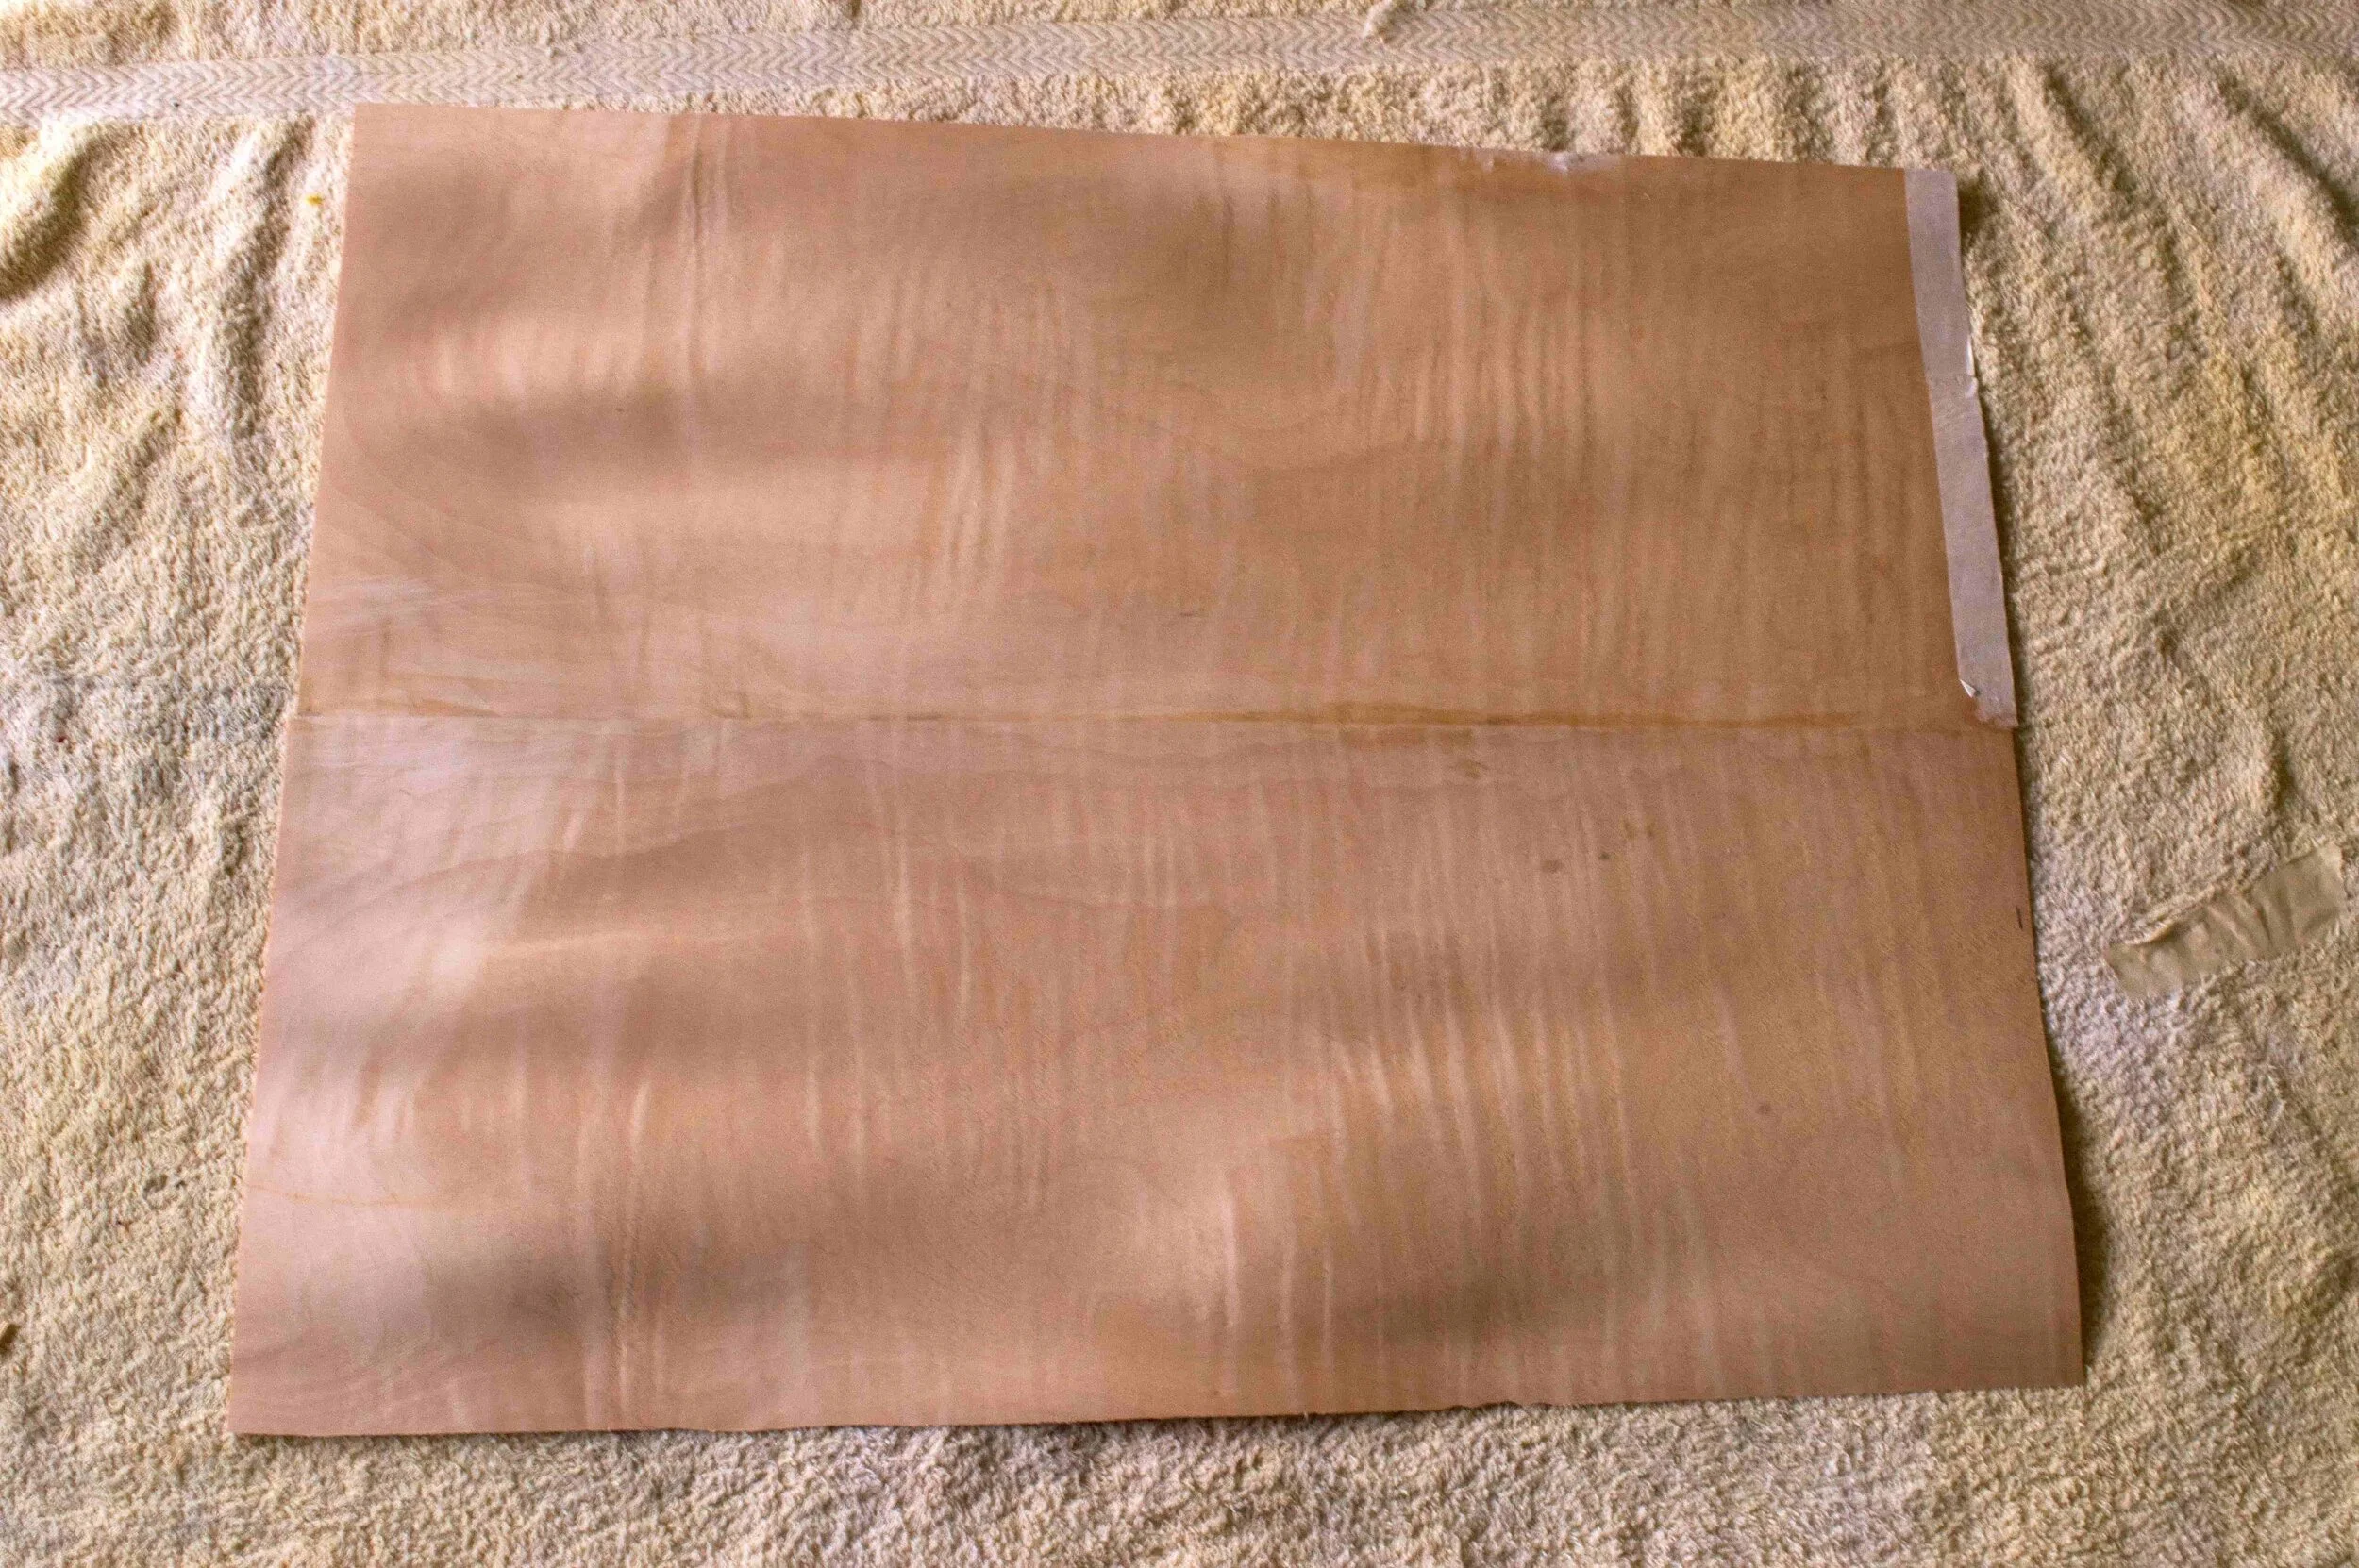
Bookmatched sheets of curly maple veneer are glued together before fixing onto the body.
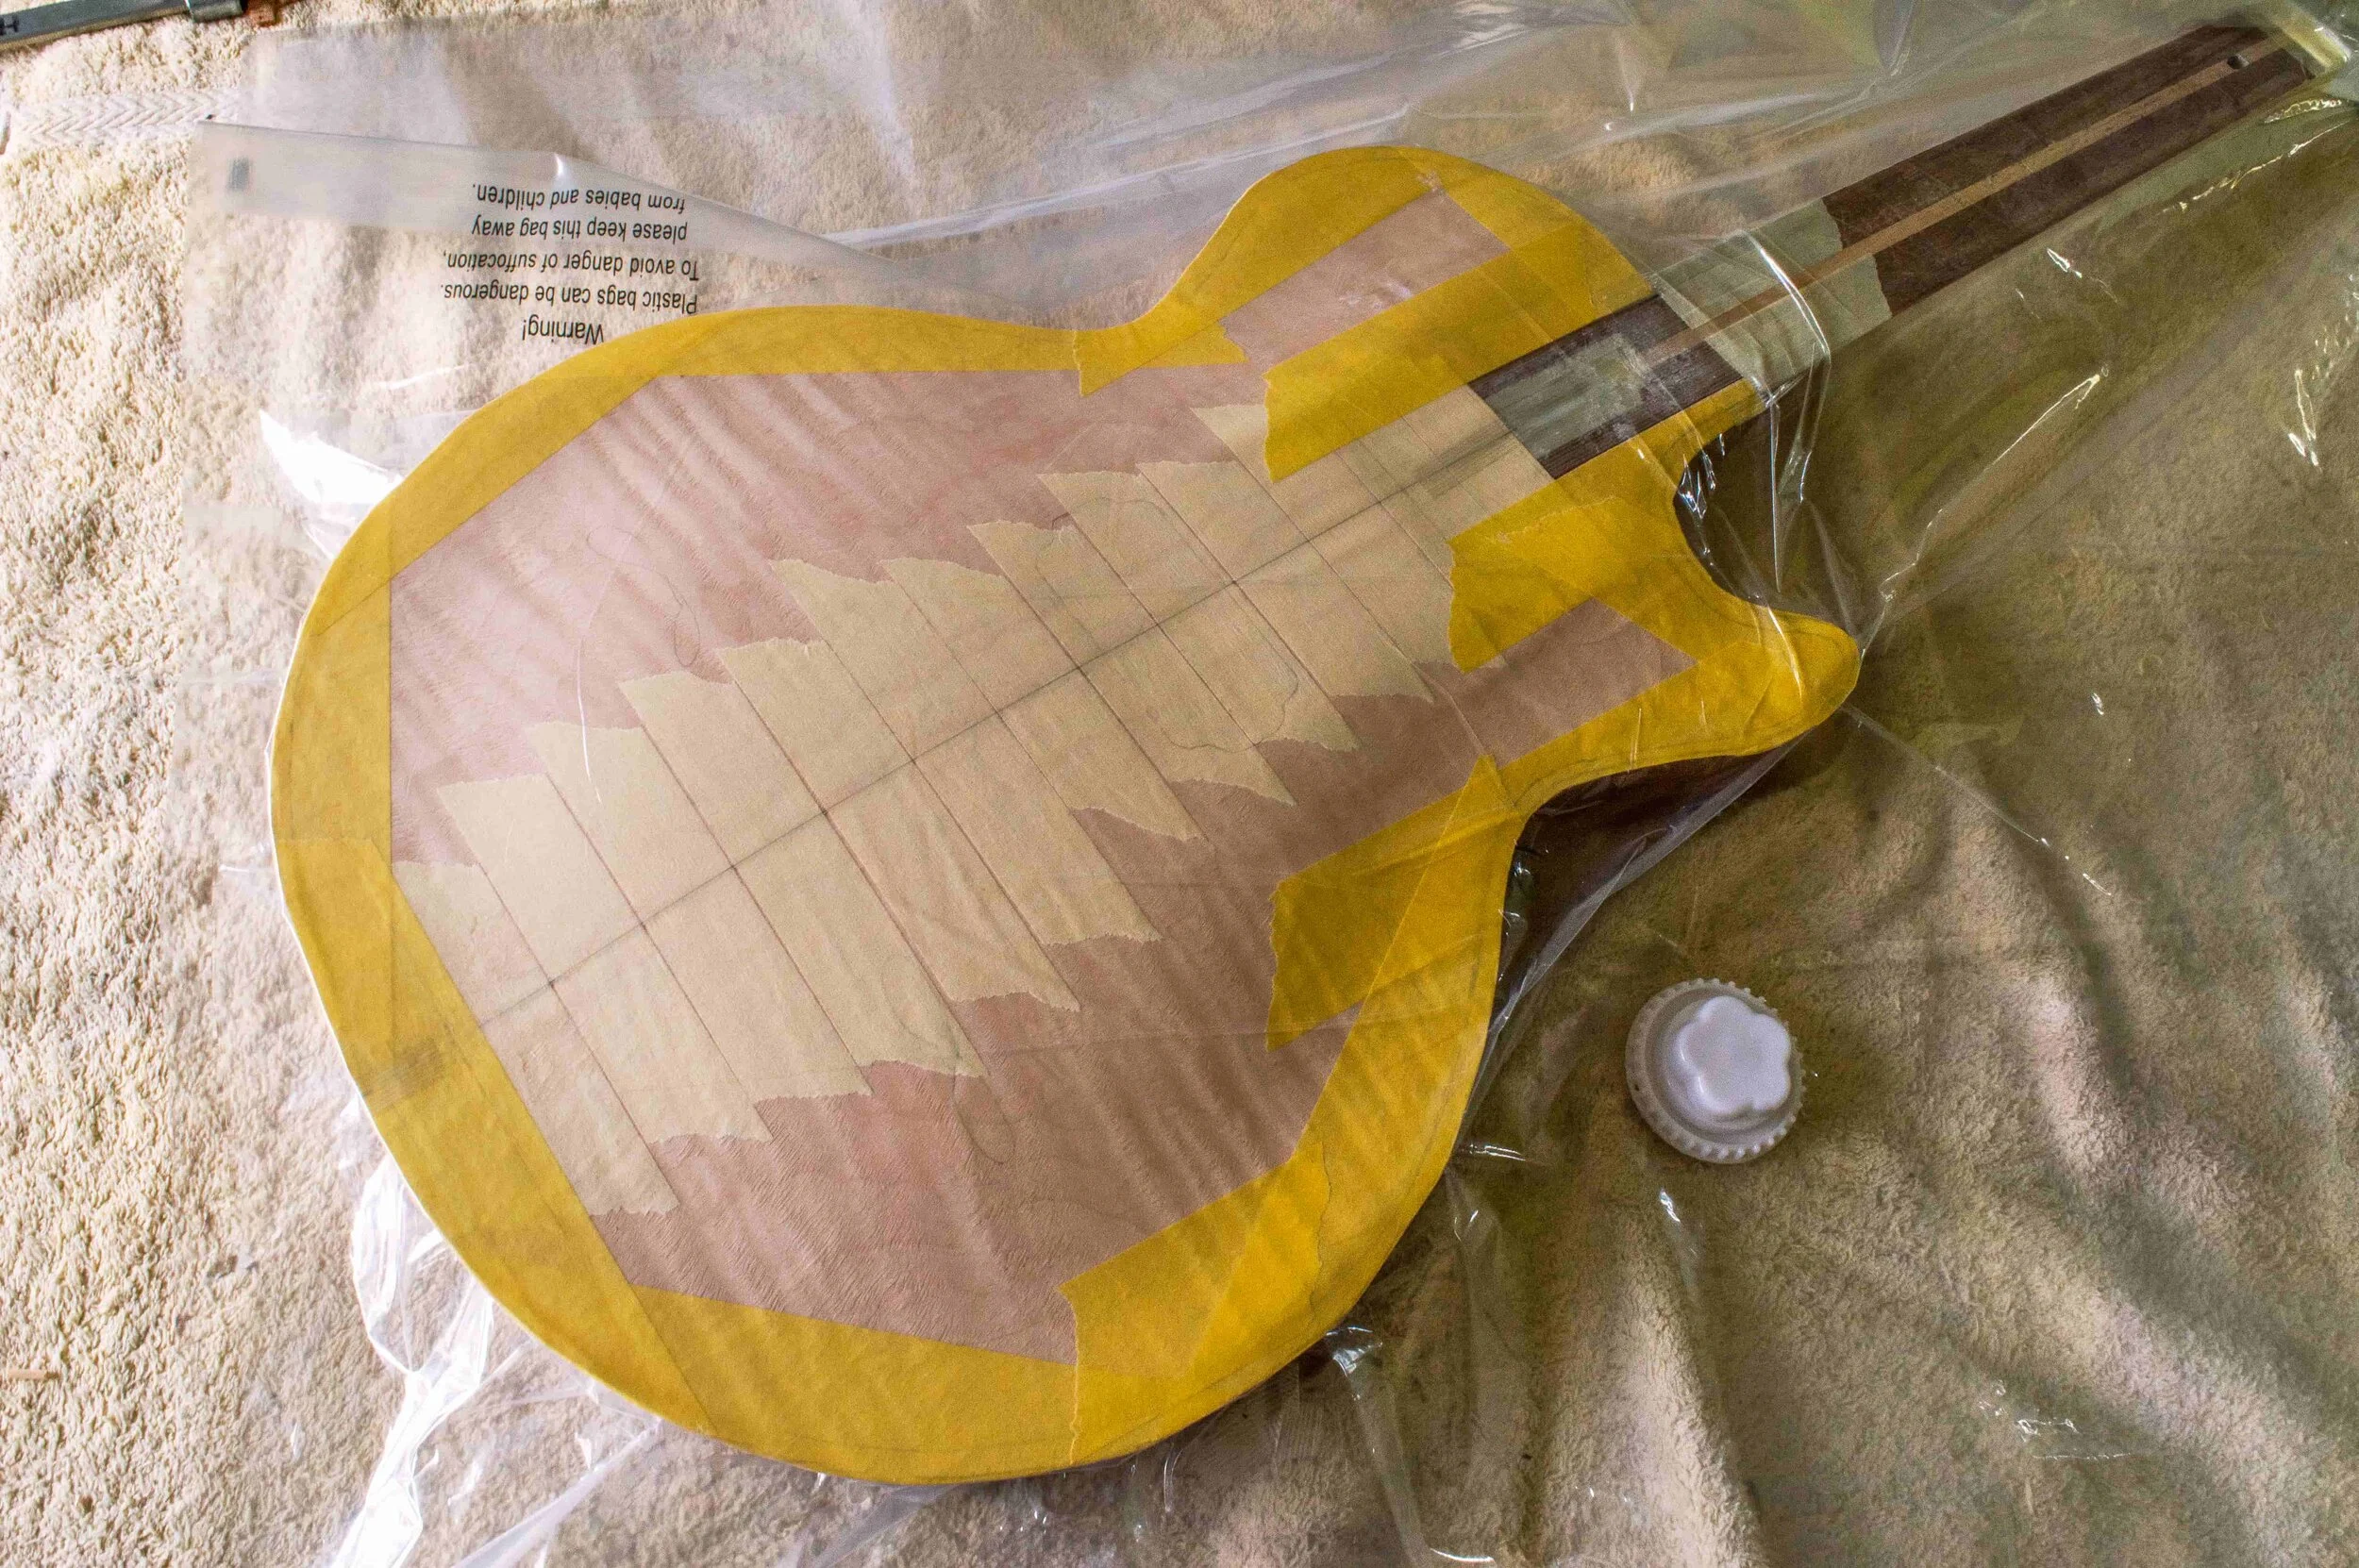
The yellow masking tape strengthens the edges and the pale masking tape is fixed across the centre join before the body goes into the vacuum press.
Cascamite glue proves a better choice than cold press veneer glue and the centre join survives the process intact.

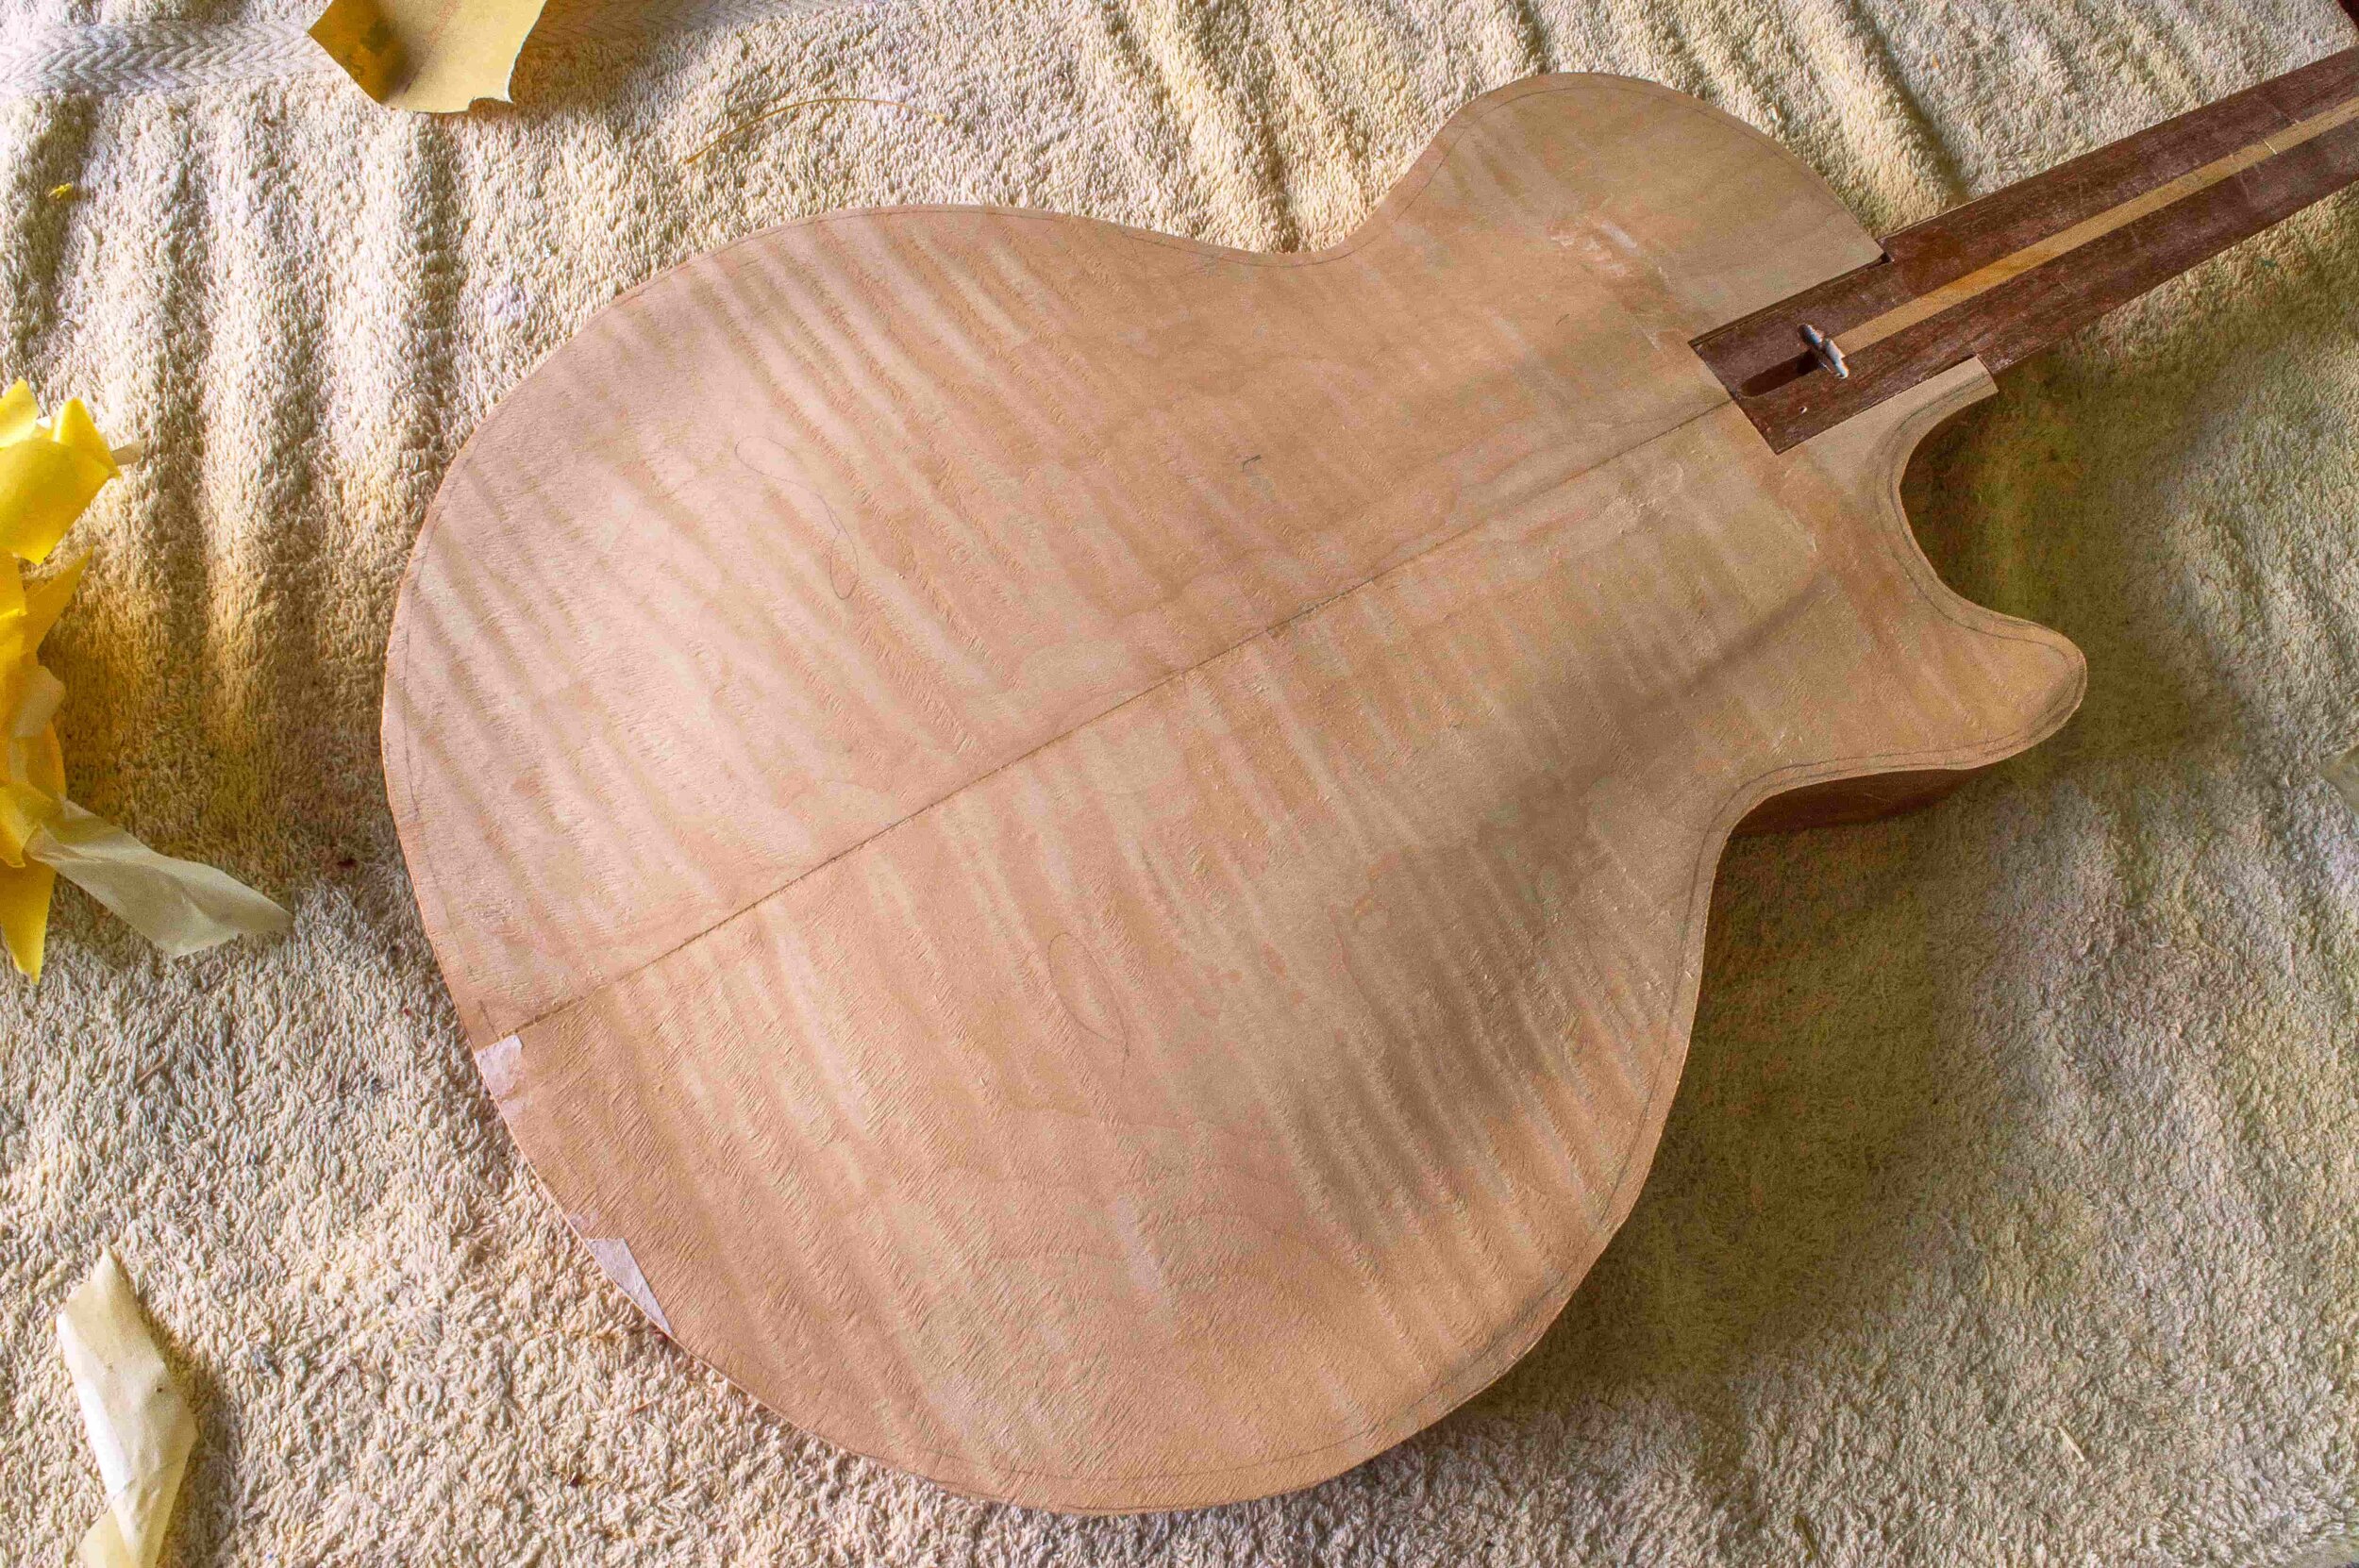
The veneer is trimmed and the holes re-established to ready the body for binding and final sanding.
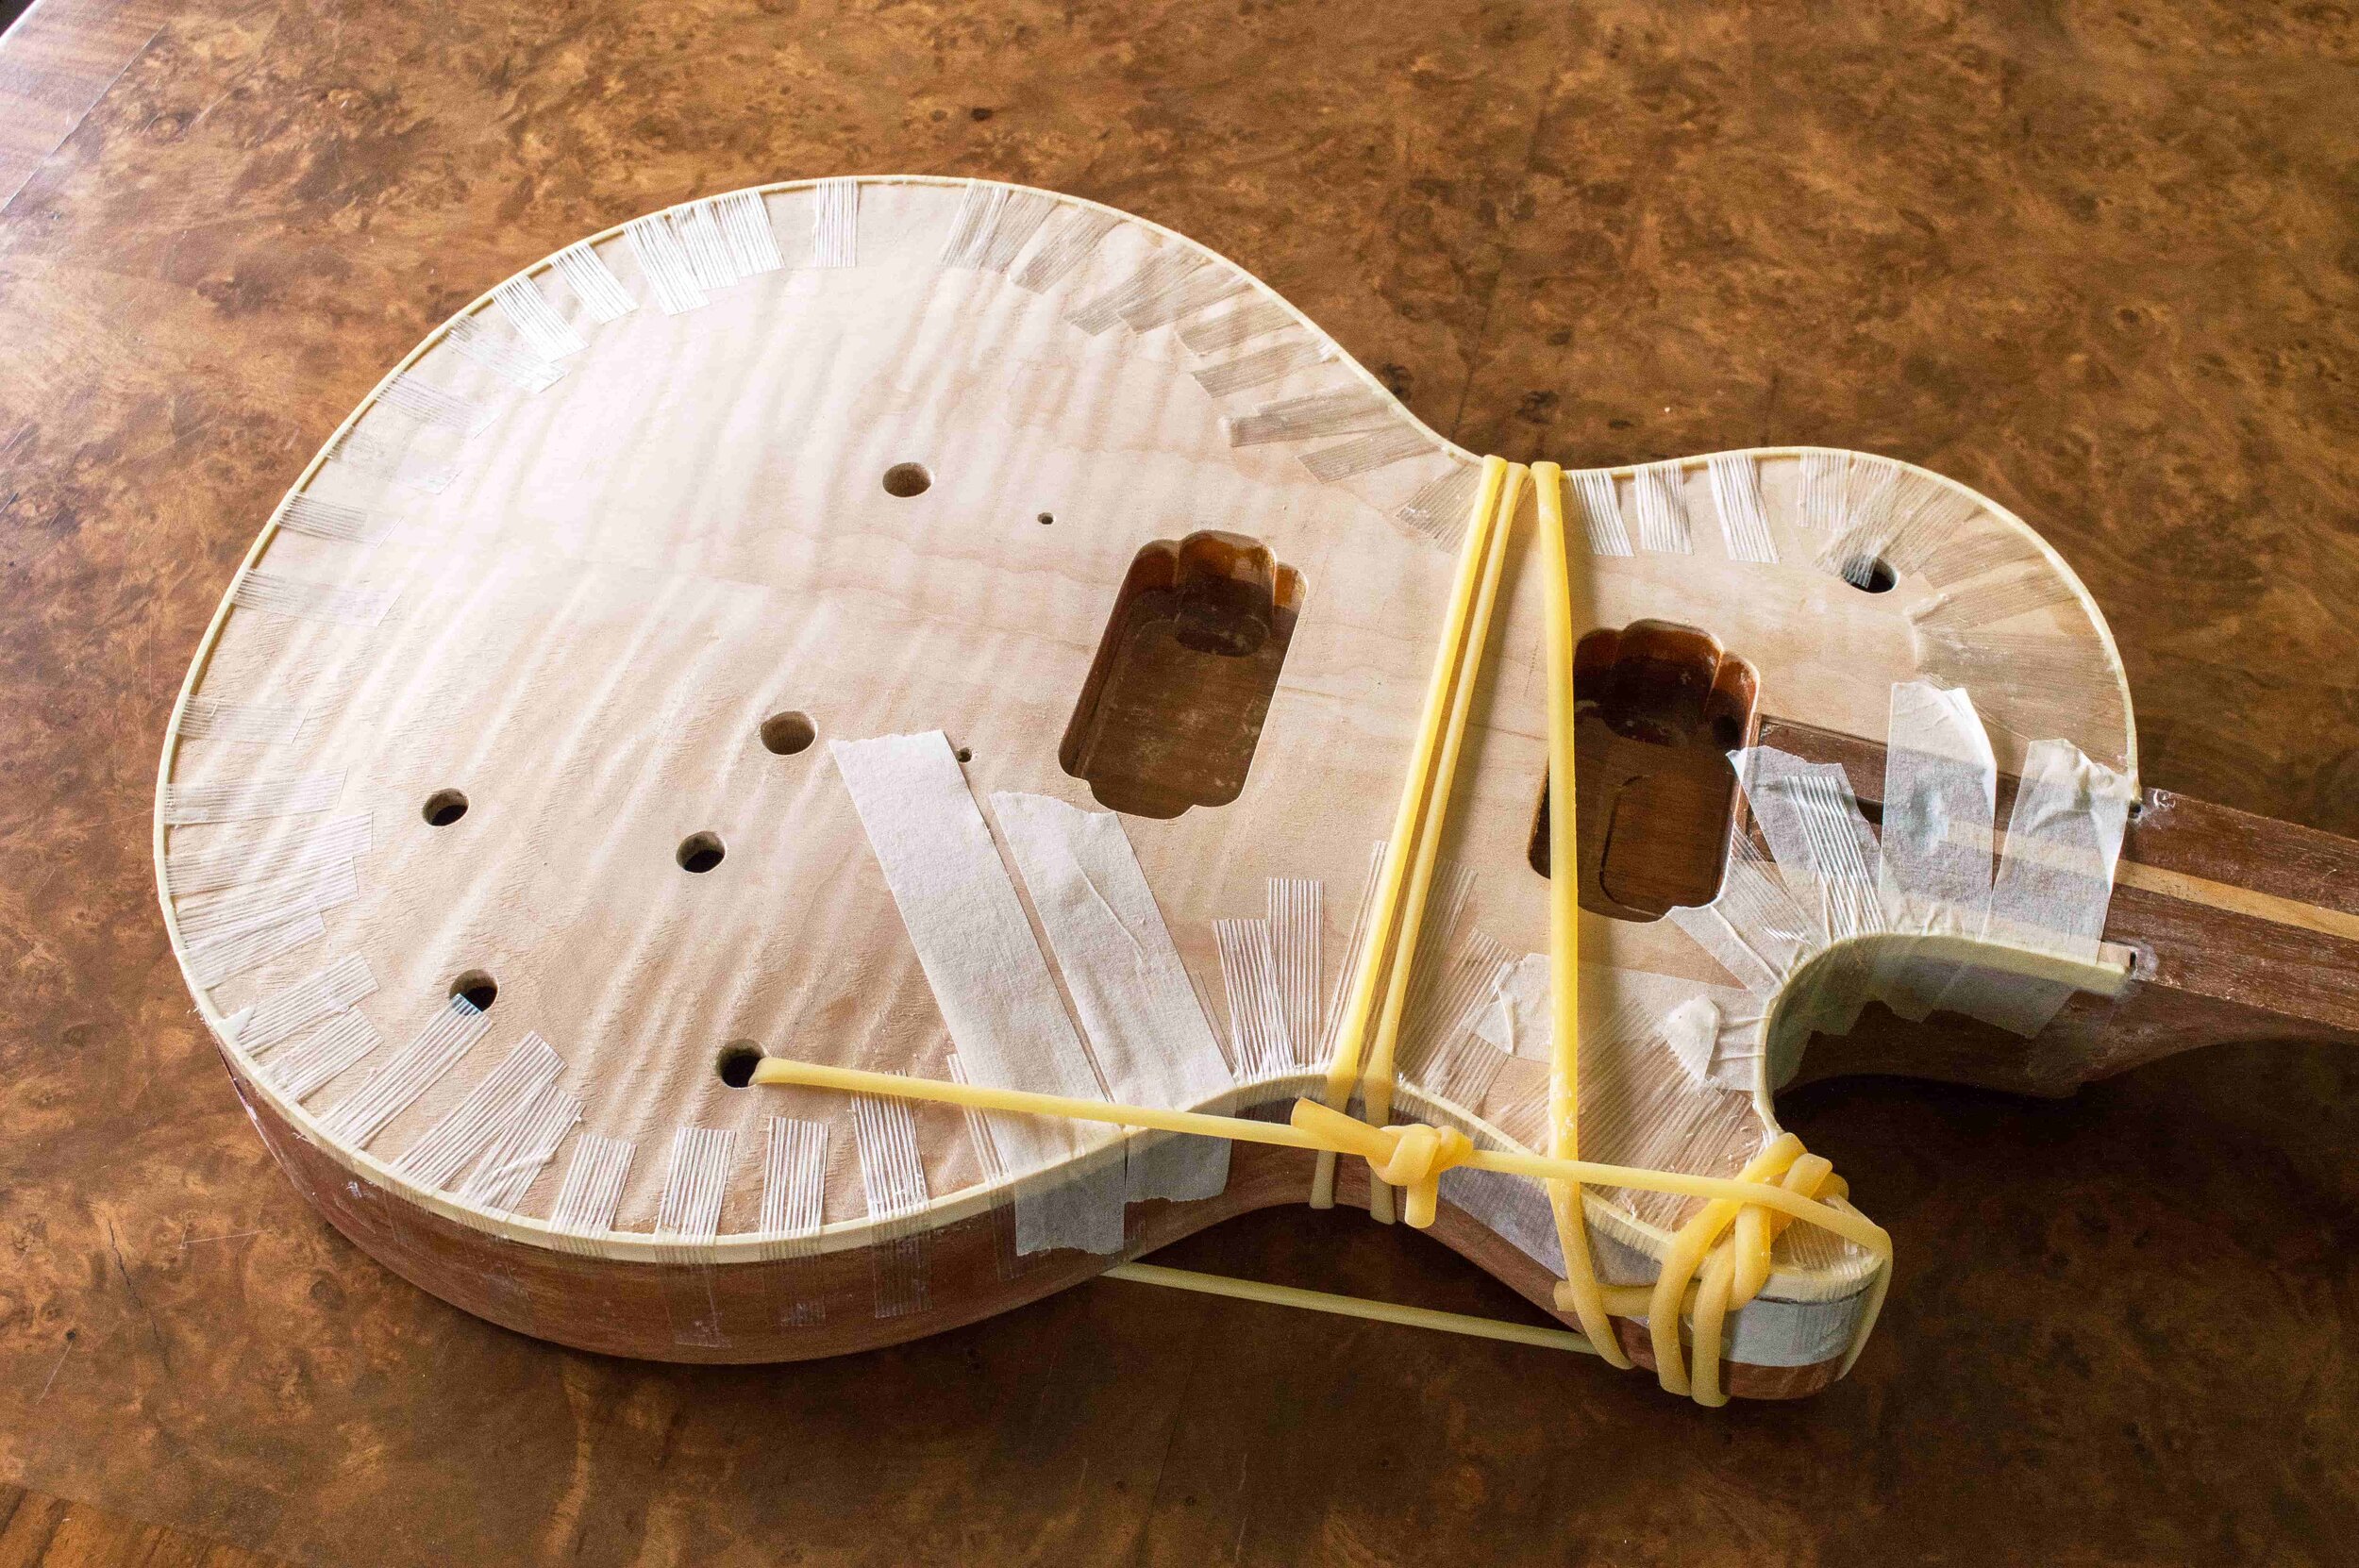
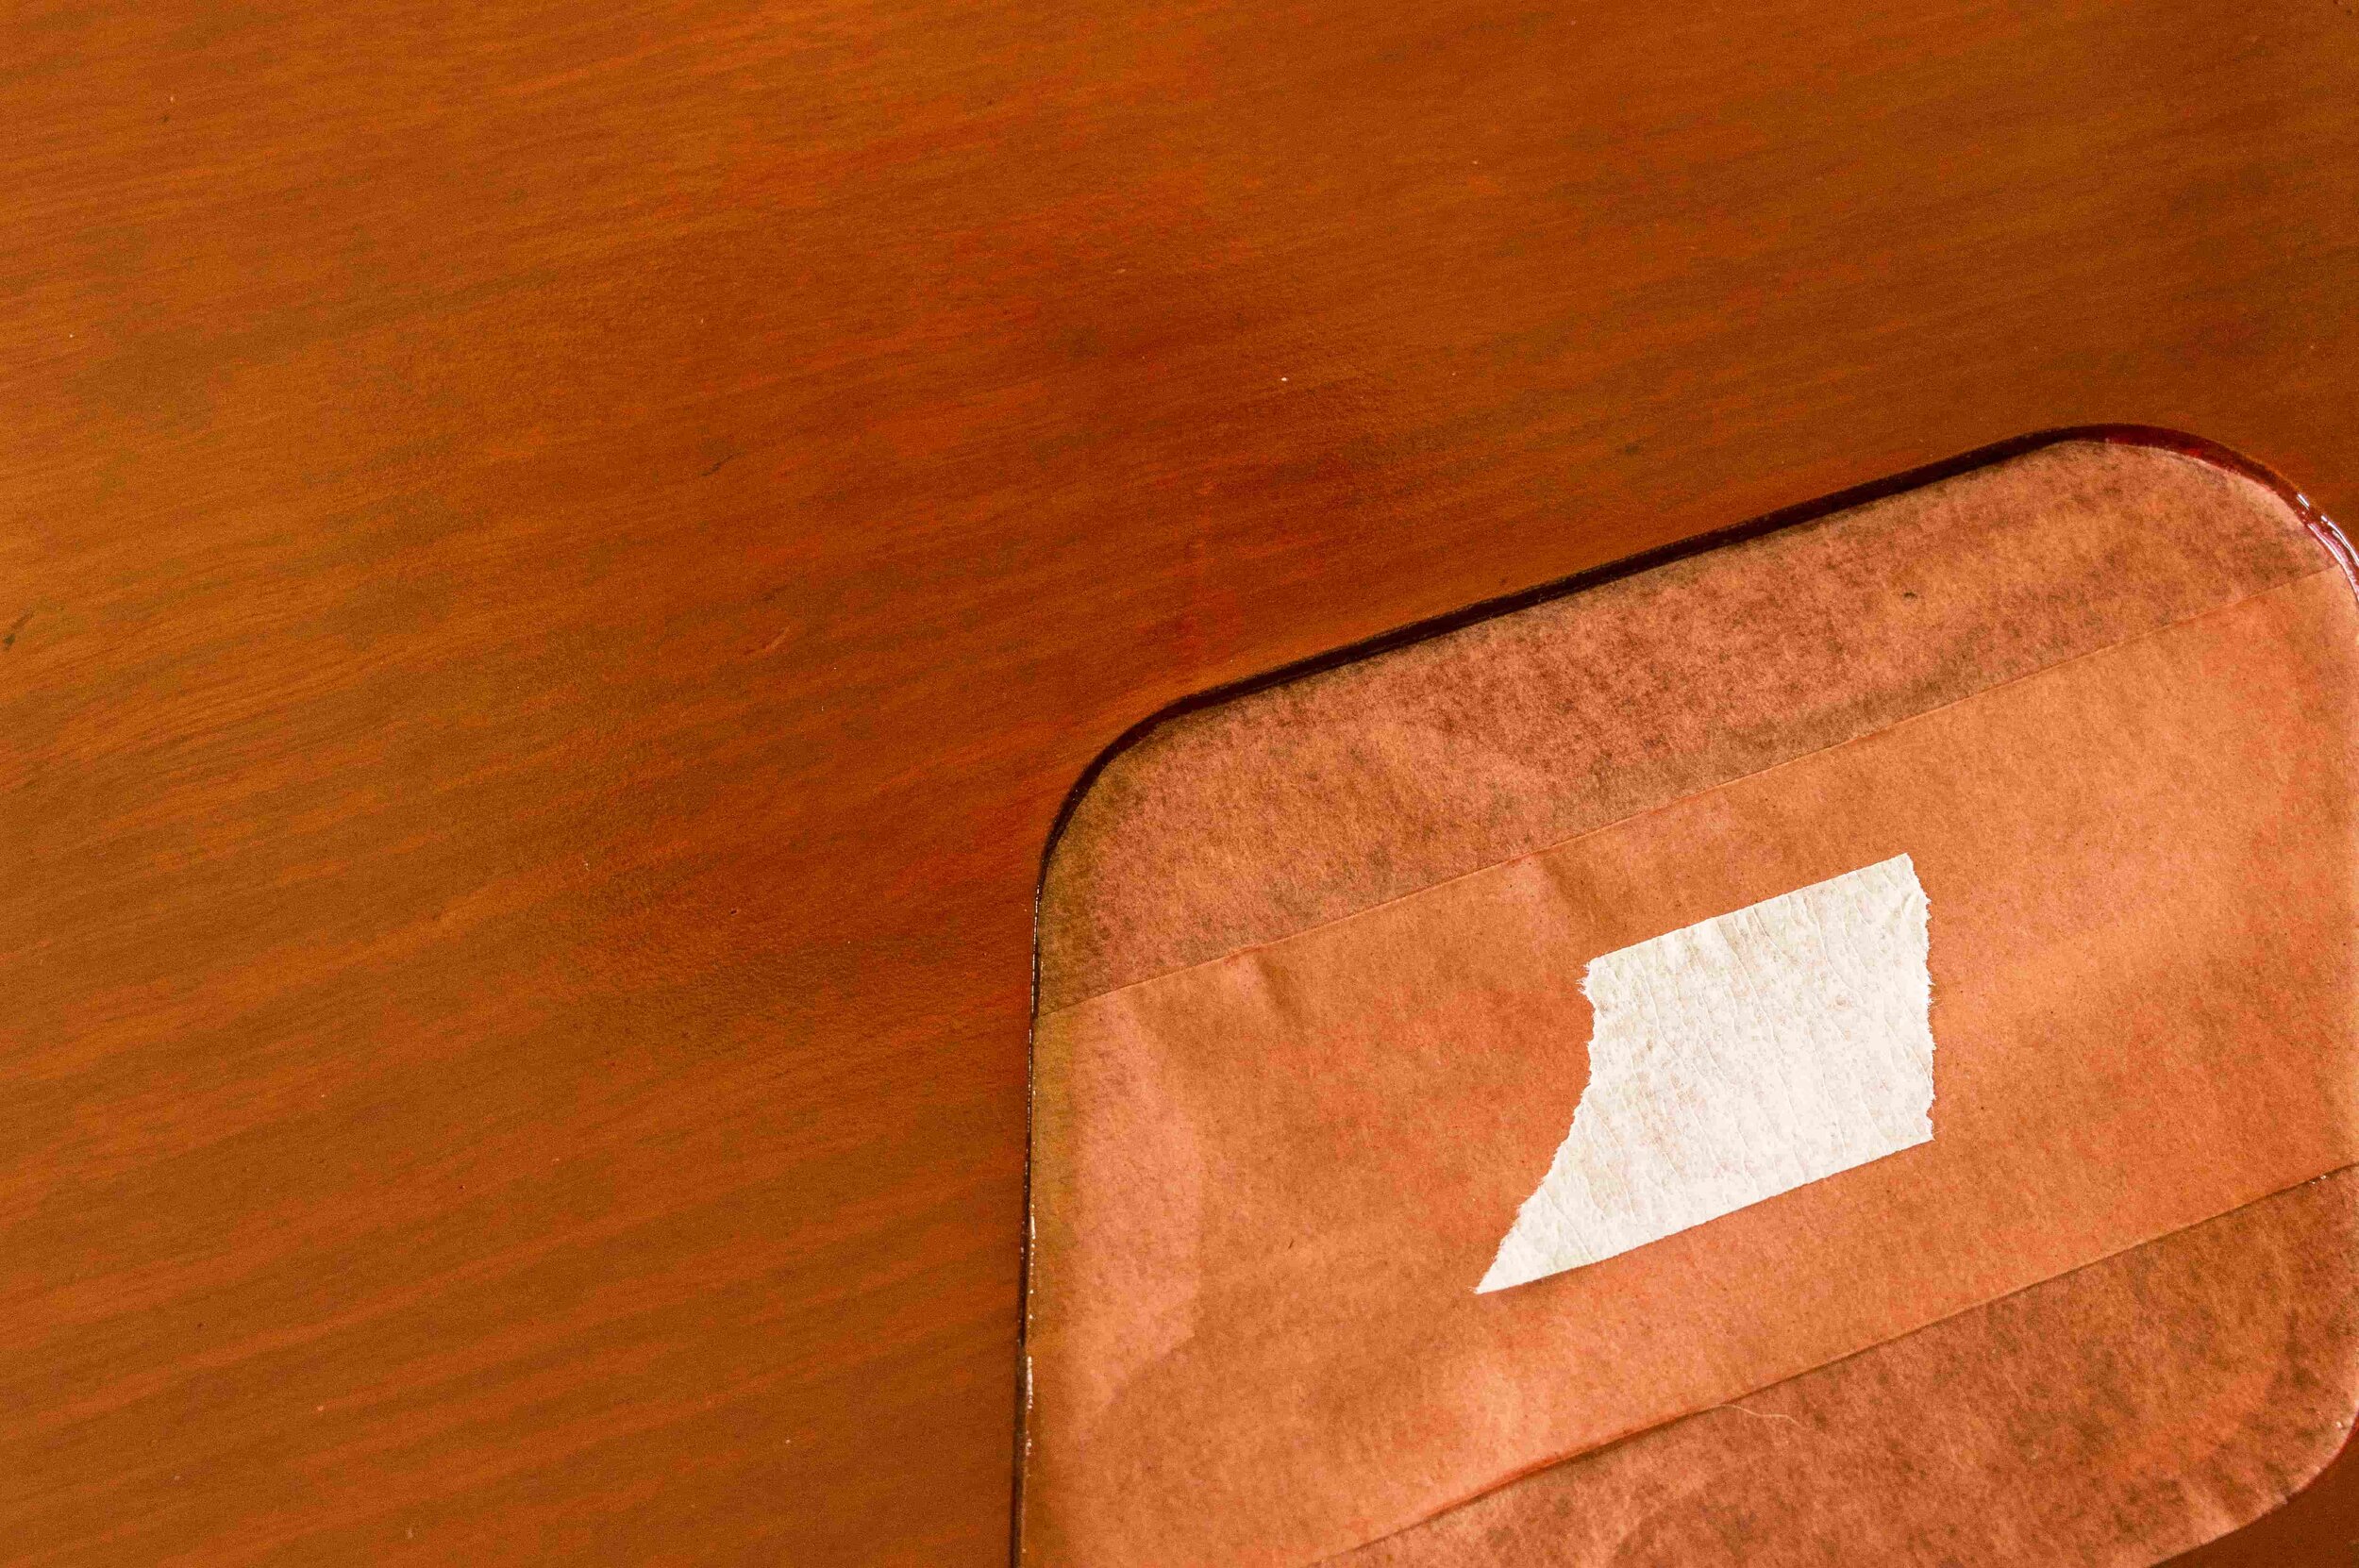
The binding has to be heated to bend around the cutaway and horn, with tape ans surgical tubing holding it in position as the binding cement dries.

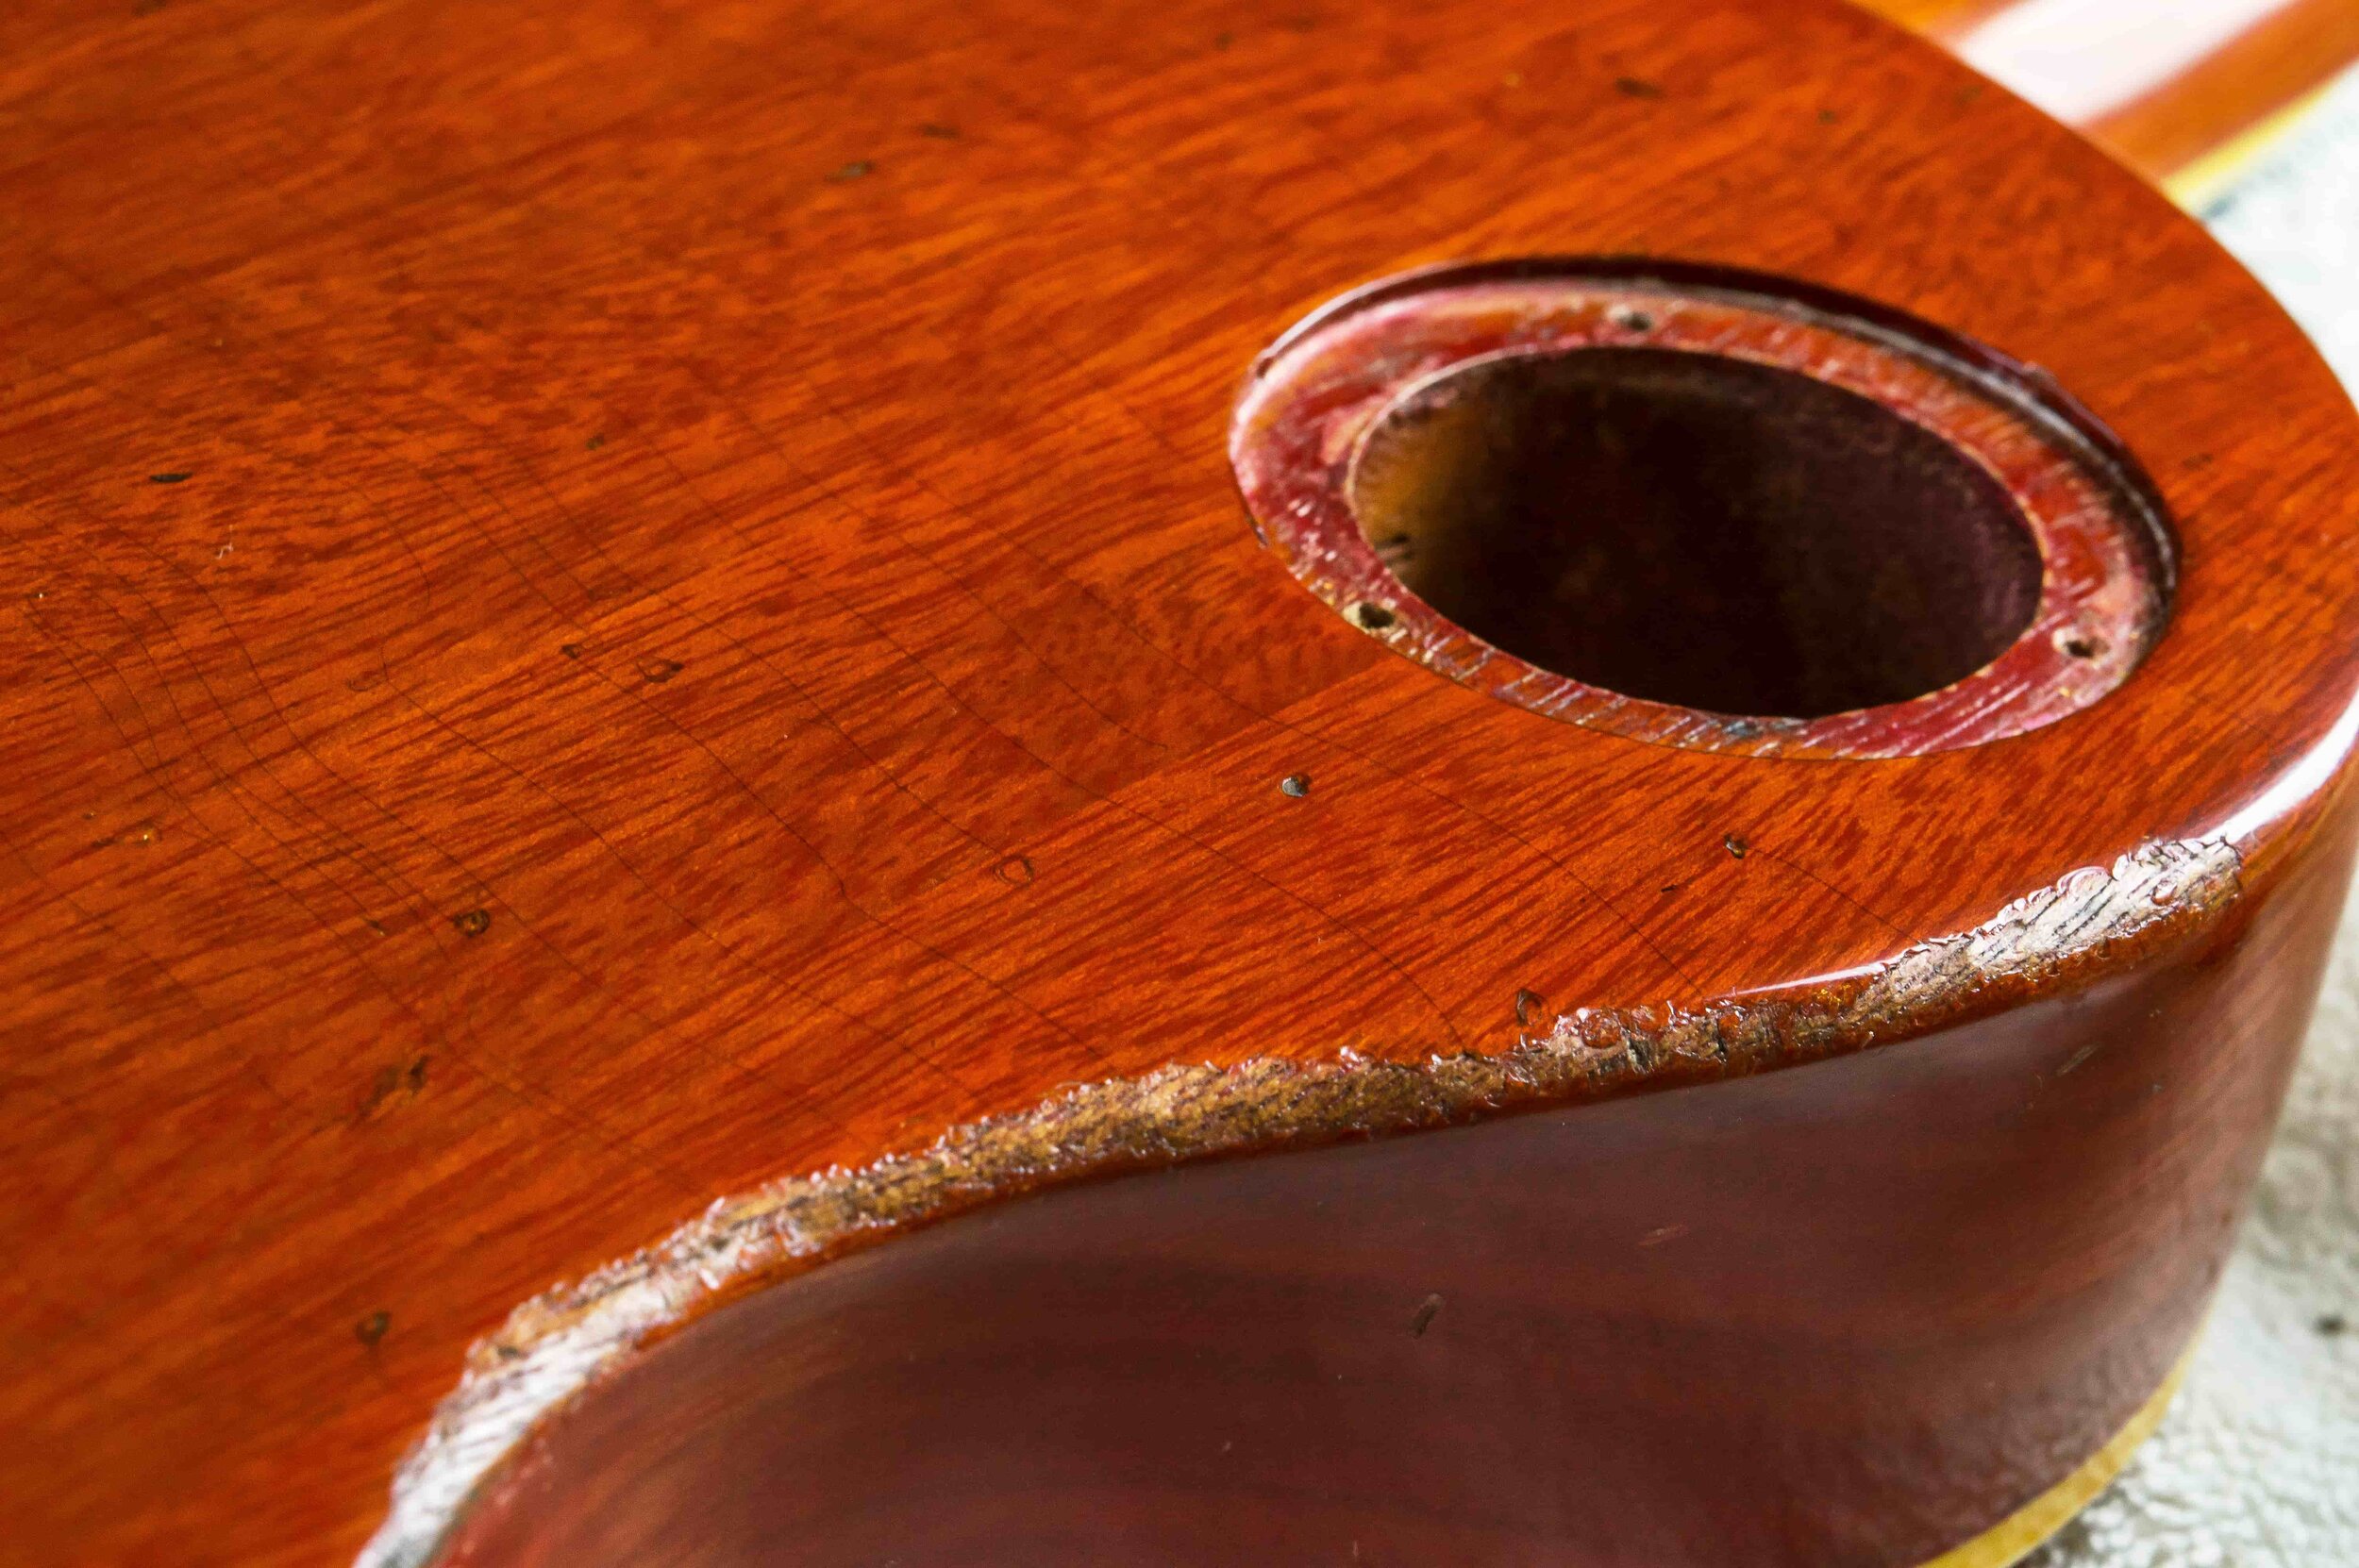
Dartford’s thixotropic cherry red grain filler is applied to the mahogany before spraying because mahogany is an open pore wood.
After grain filling, stray bits of filler have to be cleaned off the binding.

The contrast between the sprayed masking tape and the clean piece show how much aniline red has been sprayed onto the body and neck.

The Preval sprayer is used for the aniline yellow and the airbrush is used for shading the edges and applying the aniline red.
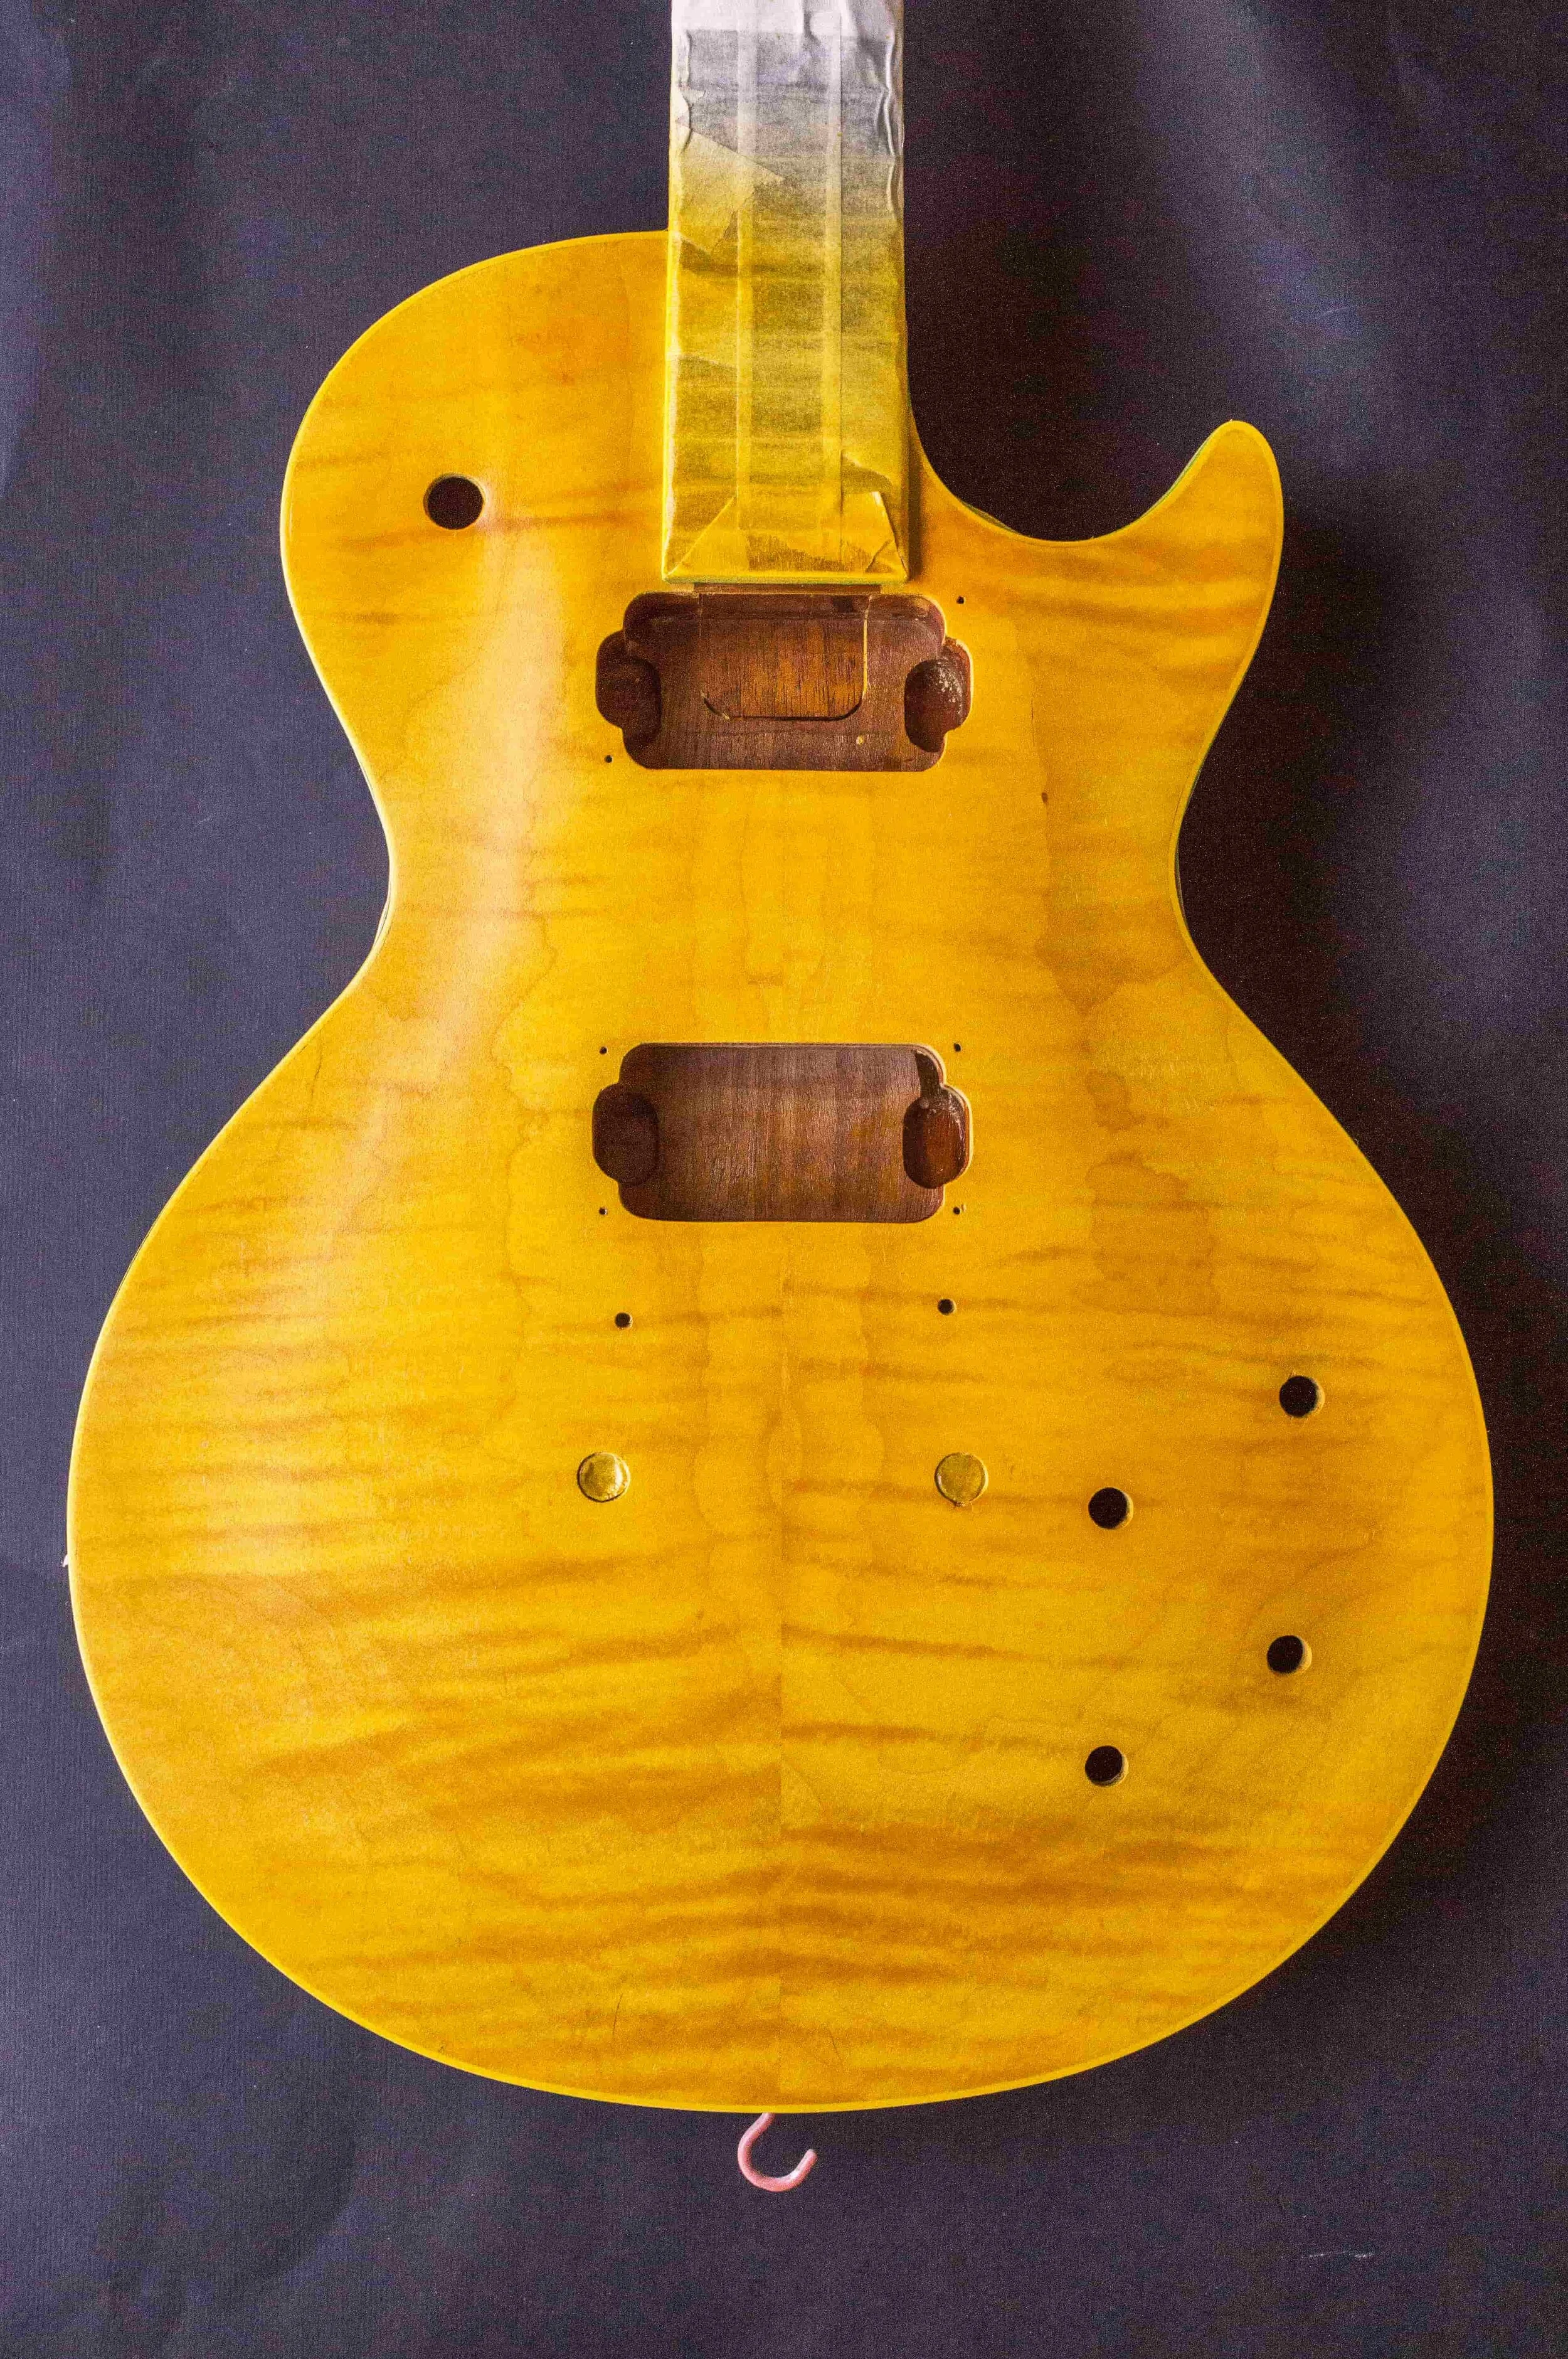
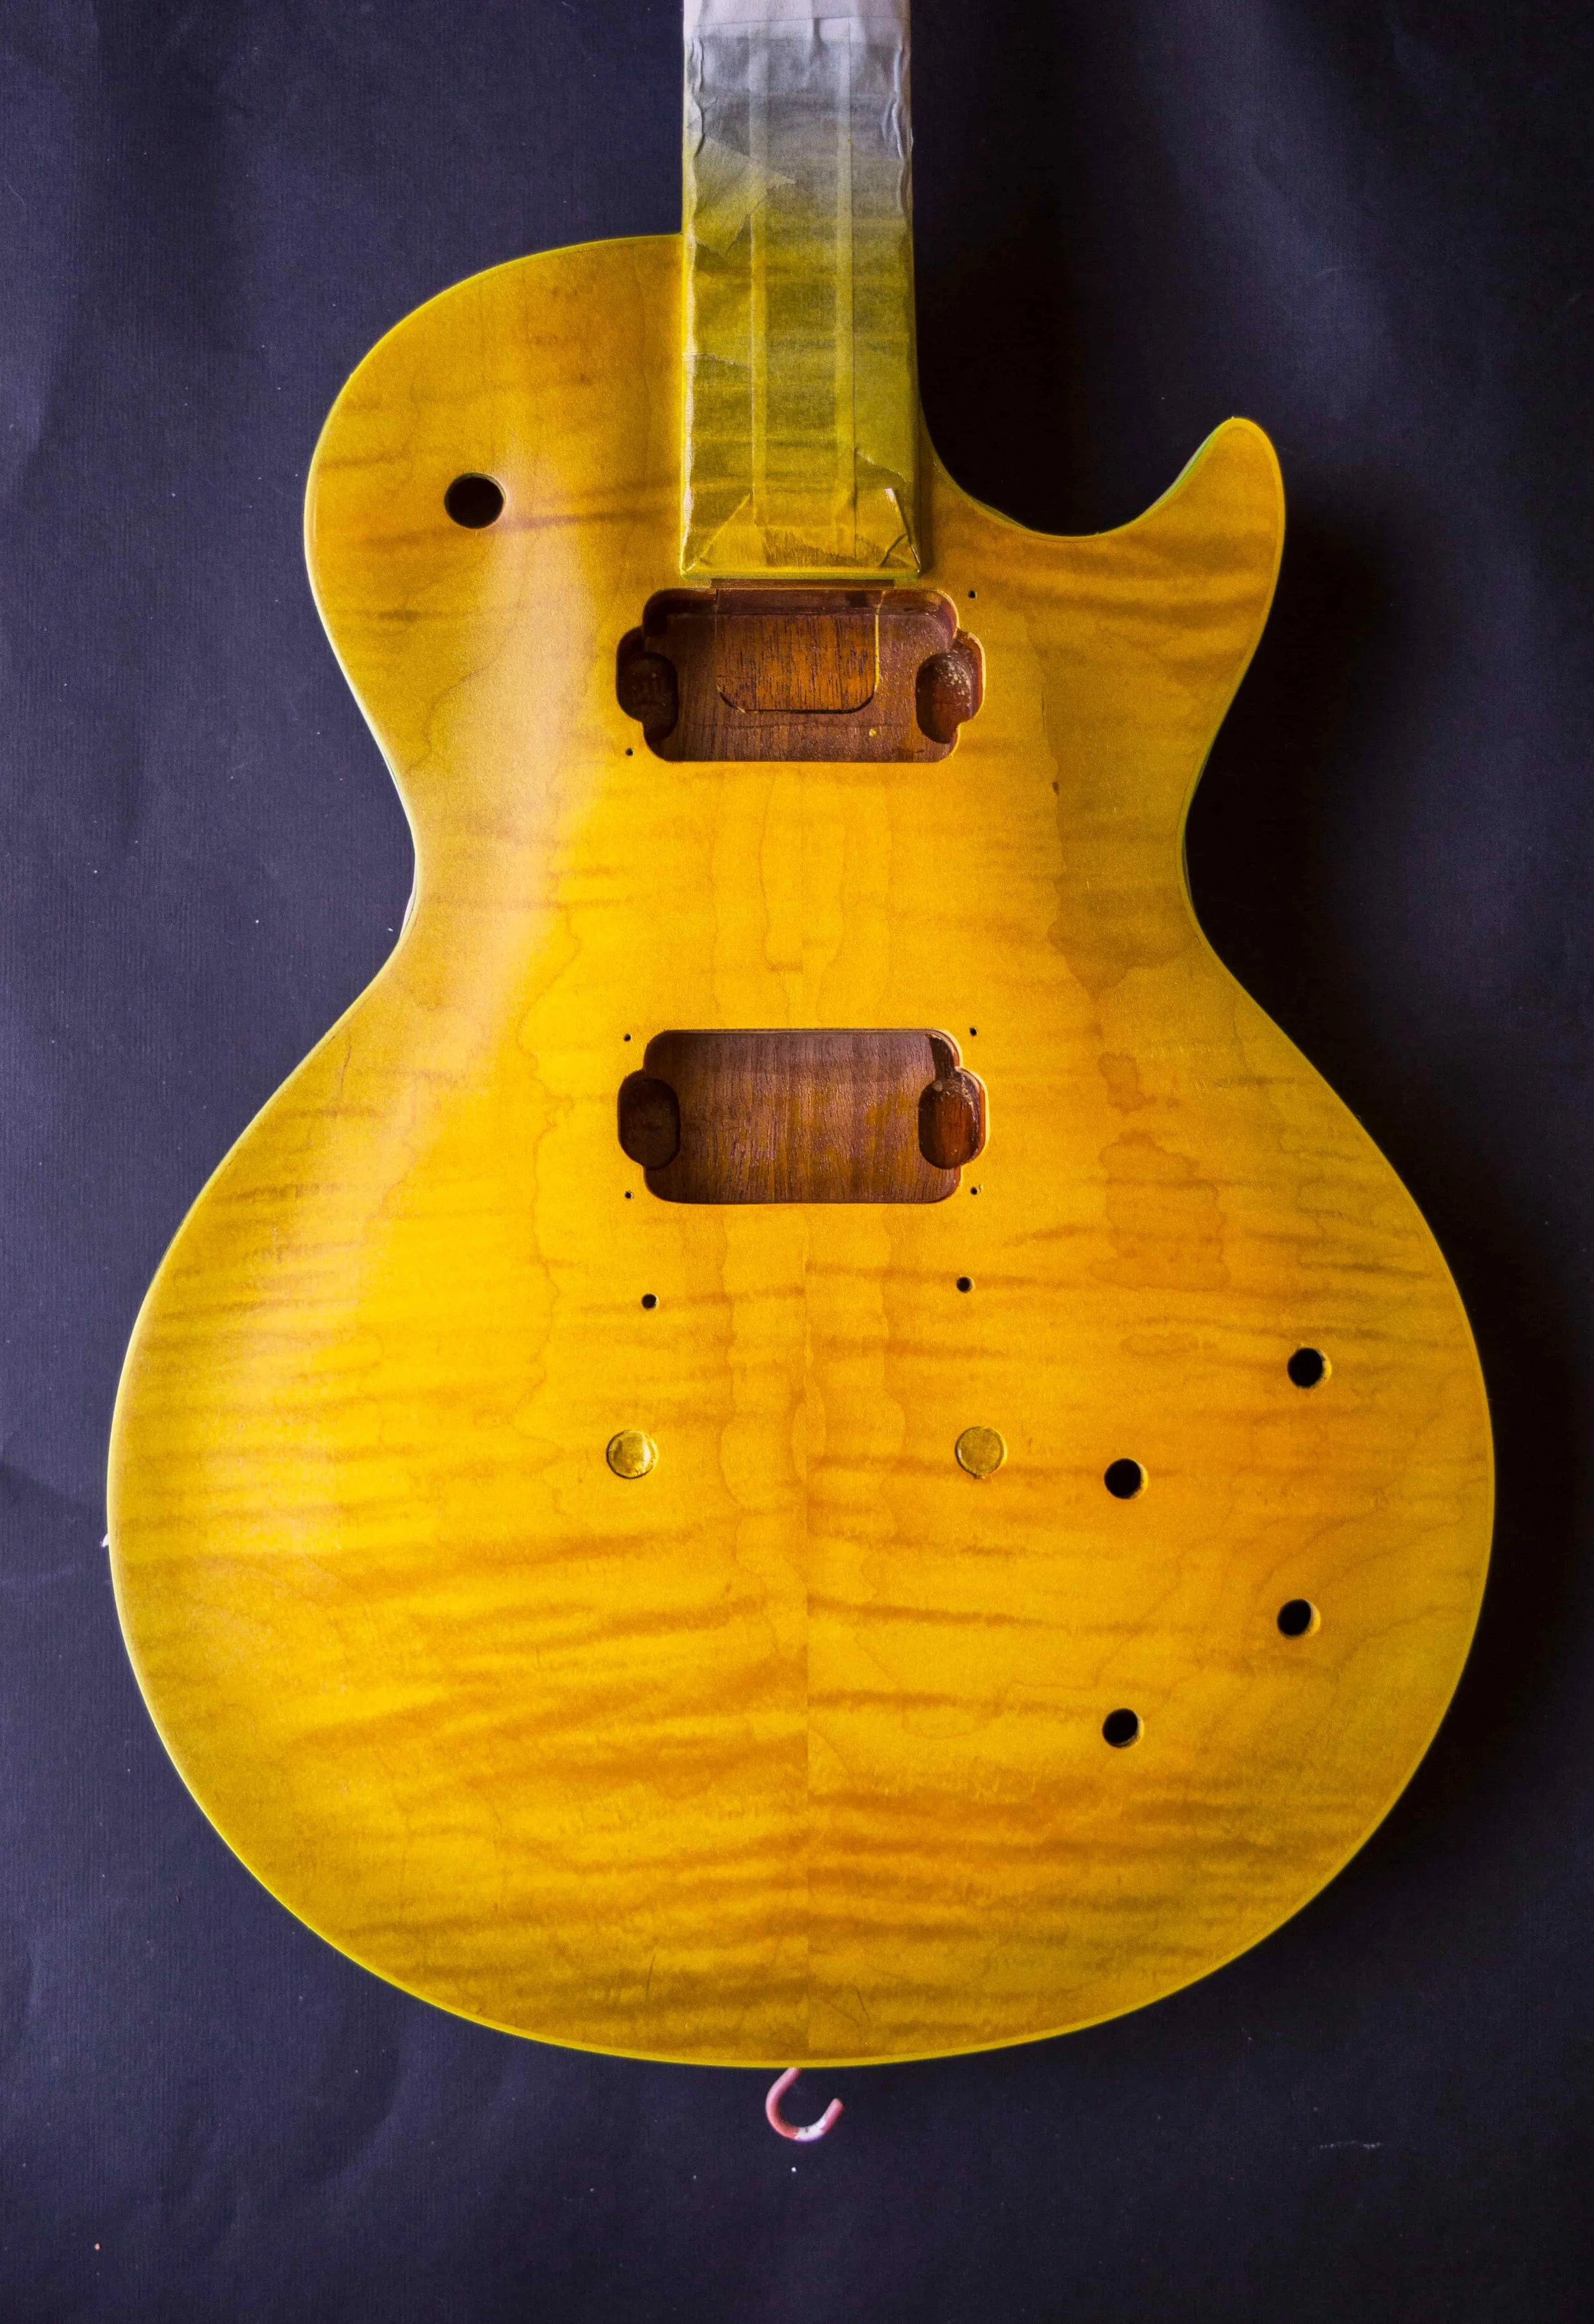
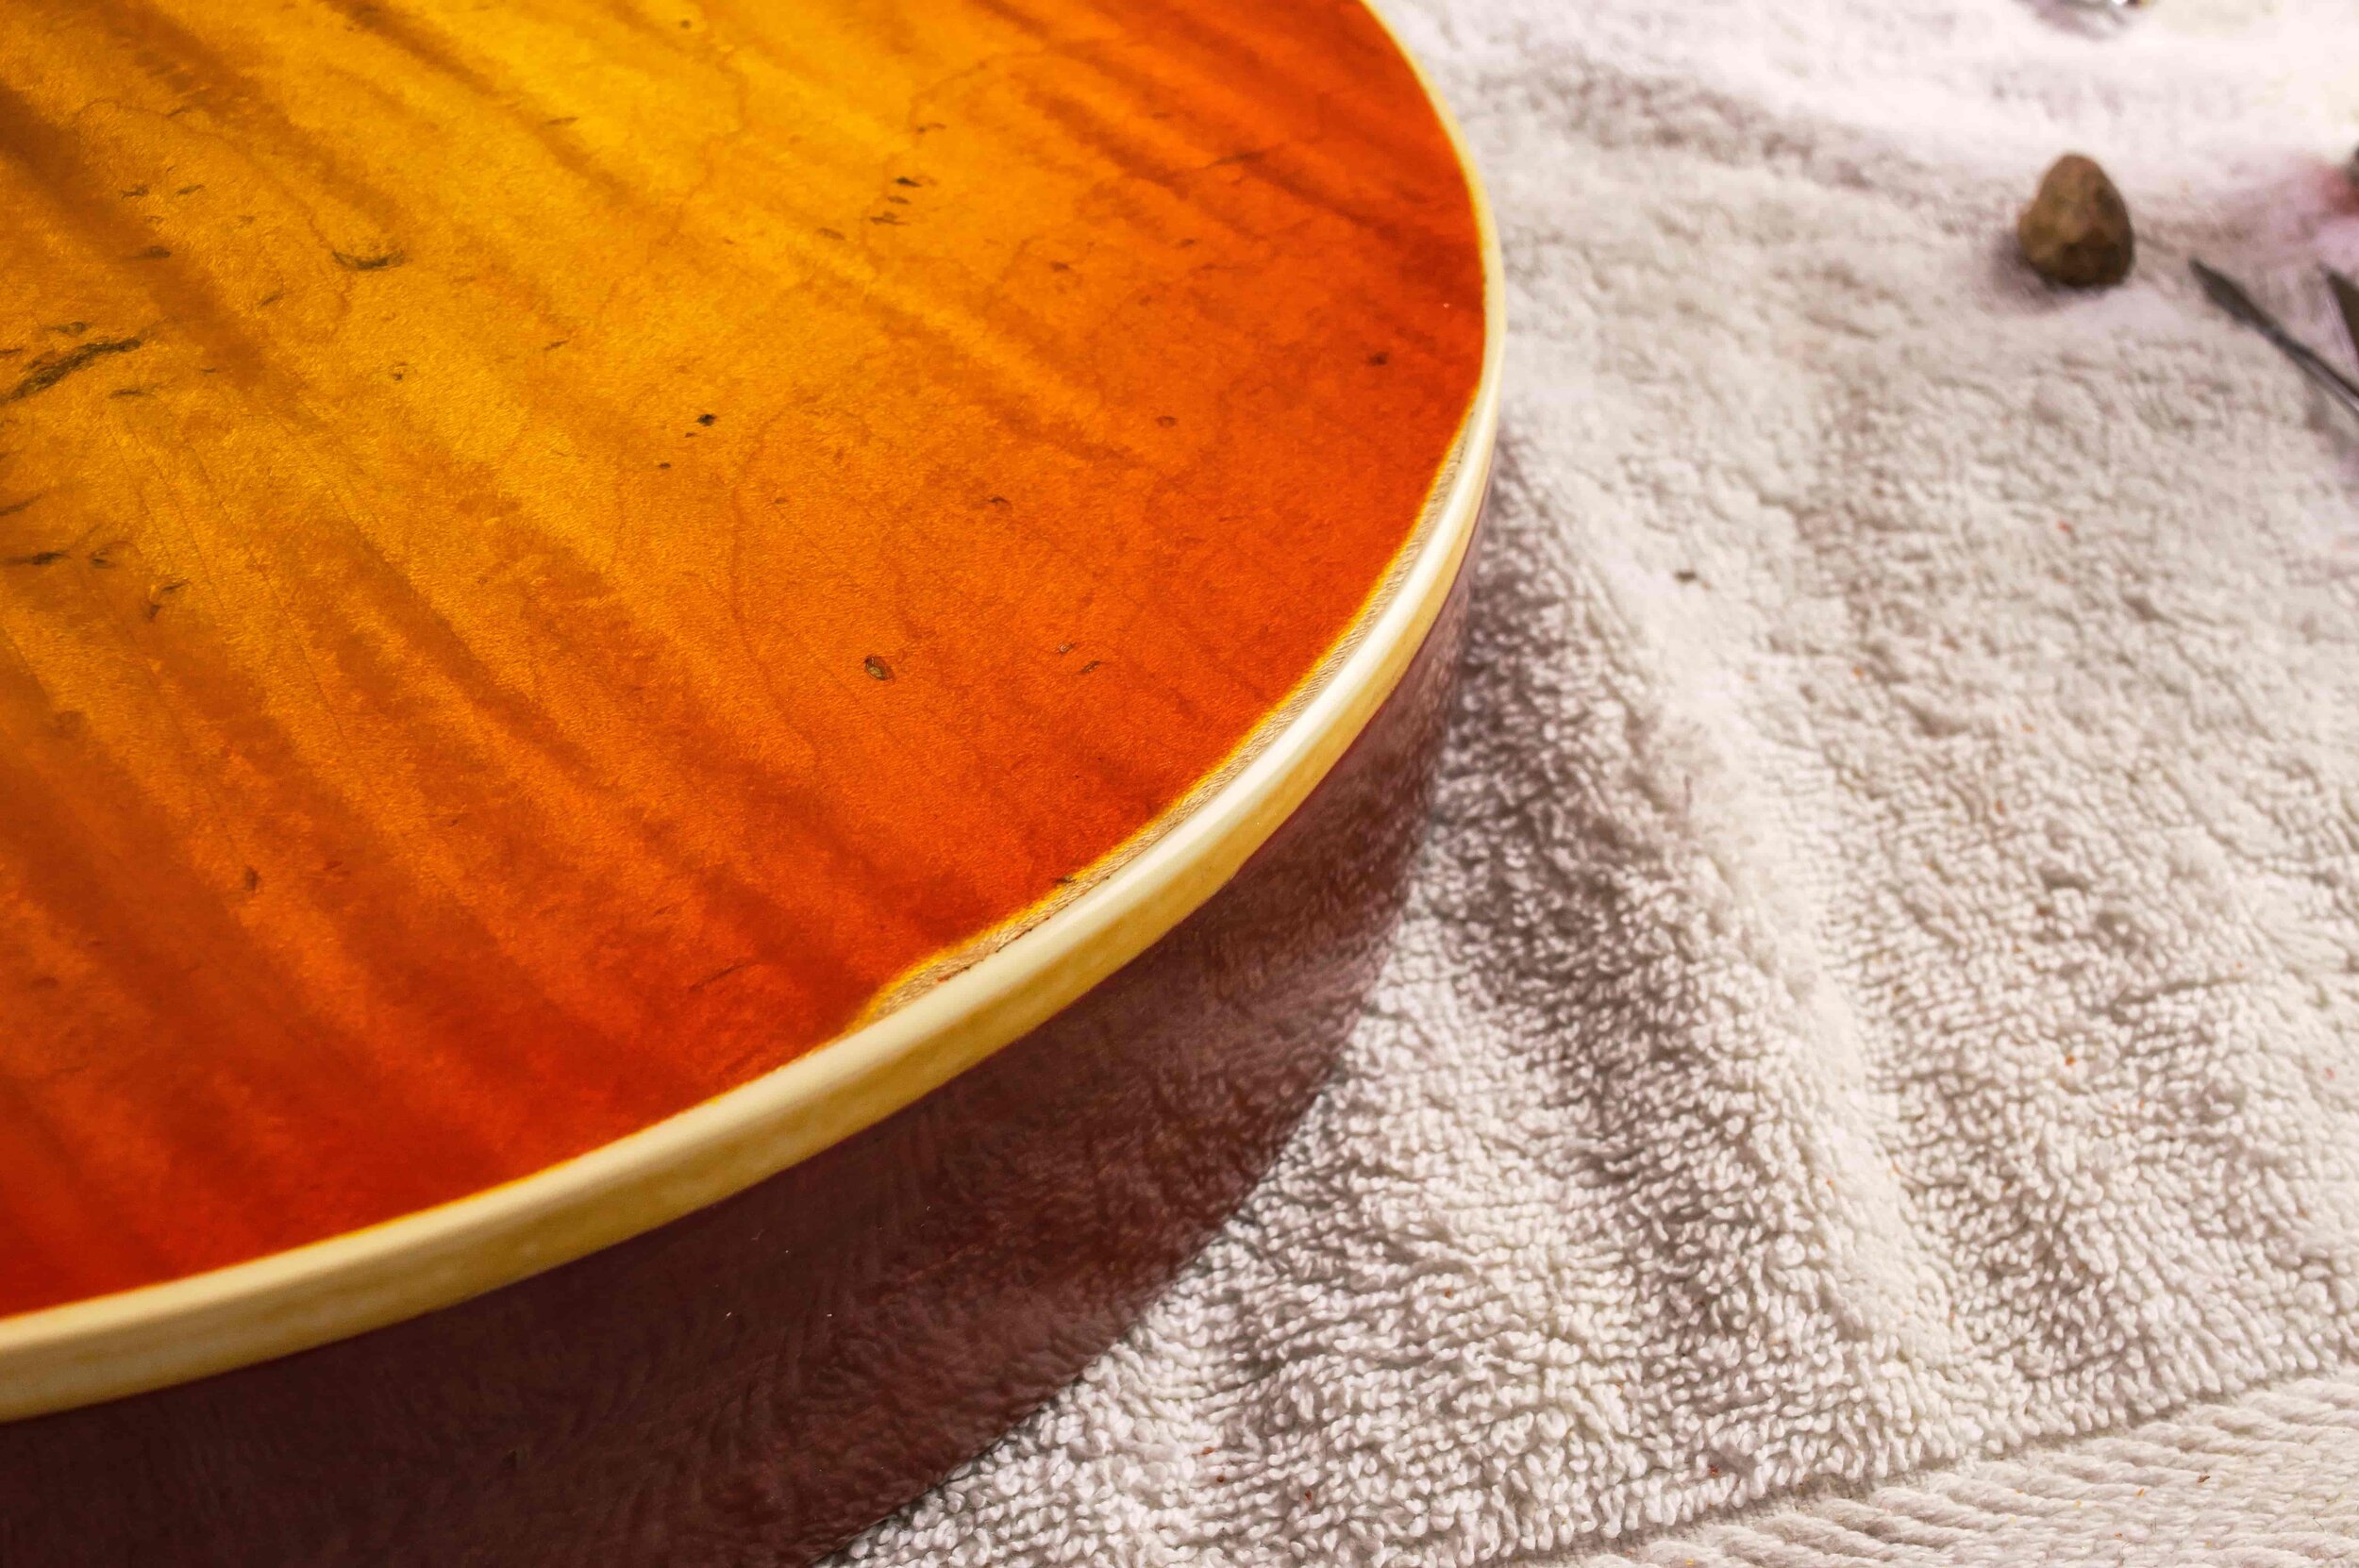
After achieving a level surface with cellulose sanding sealer, the bursting process begins with two coats of aniline yellow.
Blue, brown and black are mixed to apply a shading coat around the edges, which results in a greenish grey shadow.
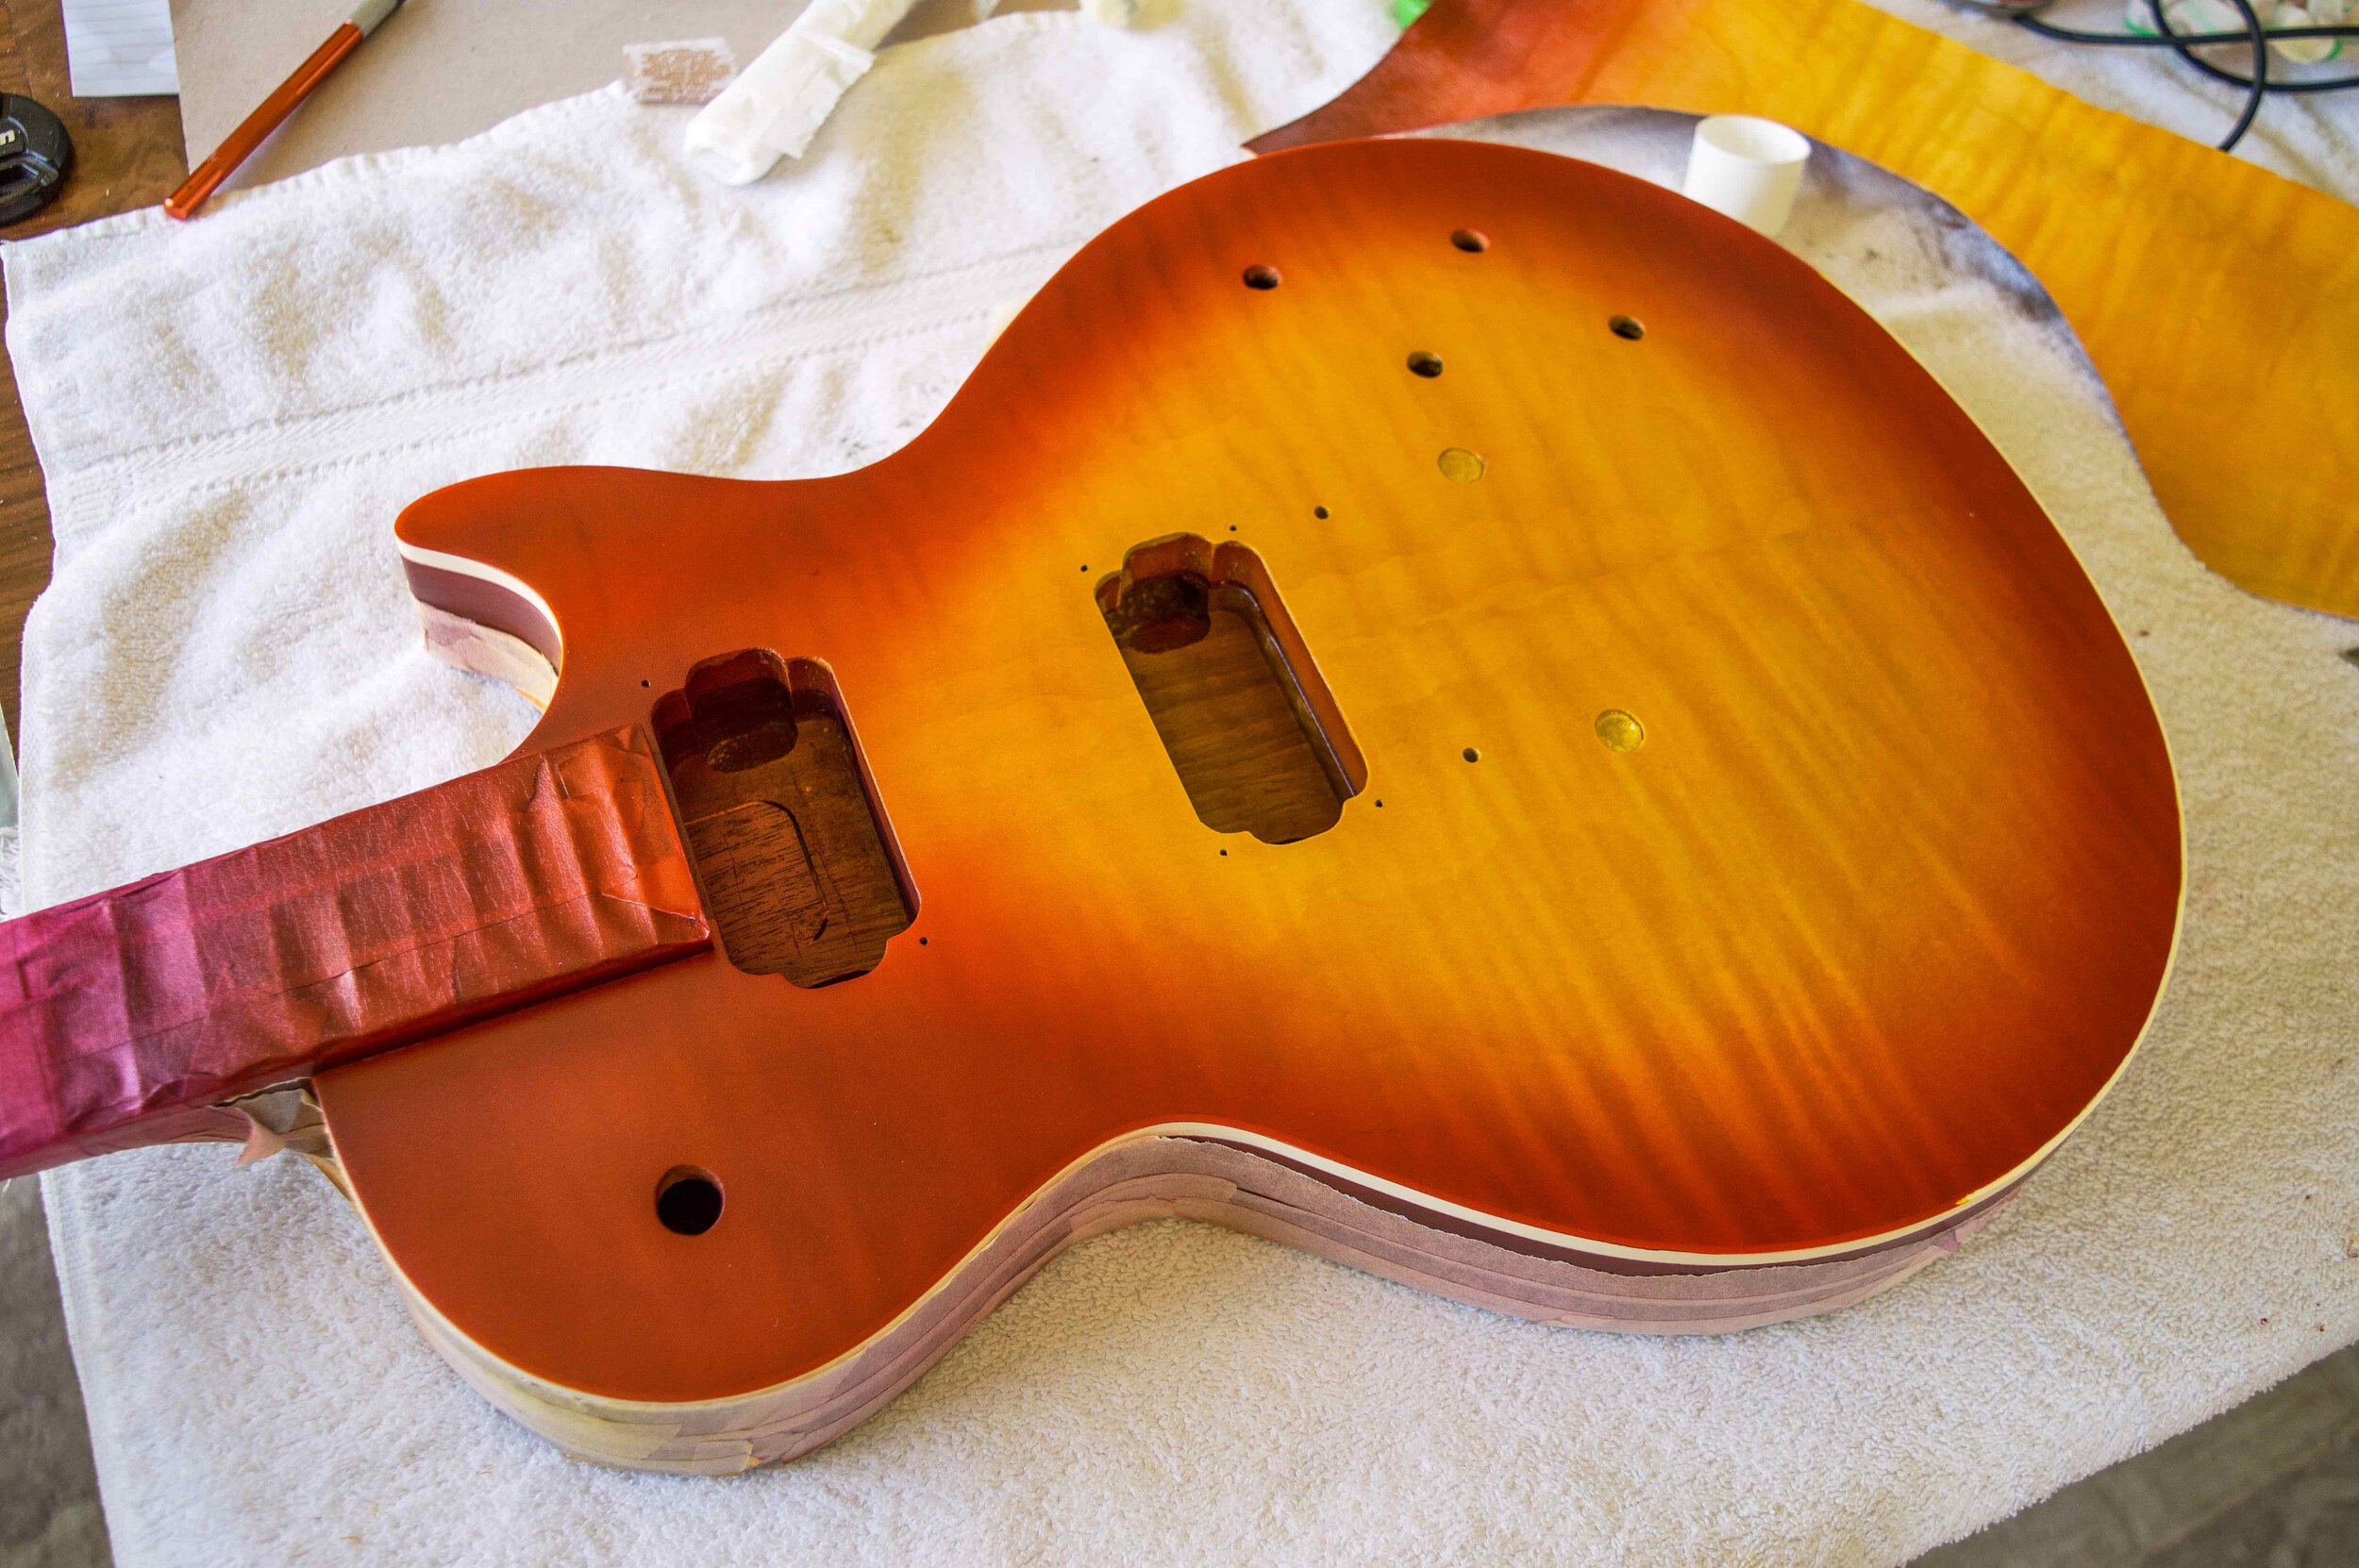
The airbrush is perfect for applying the aniline red because its fine atomisation creates a very smooth transition and it’s easy to direct the lacquer exactly where you want it.

The fading becomes visible after only a few hours, but the whole process takes several days to complete.
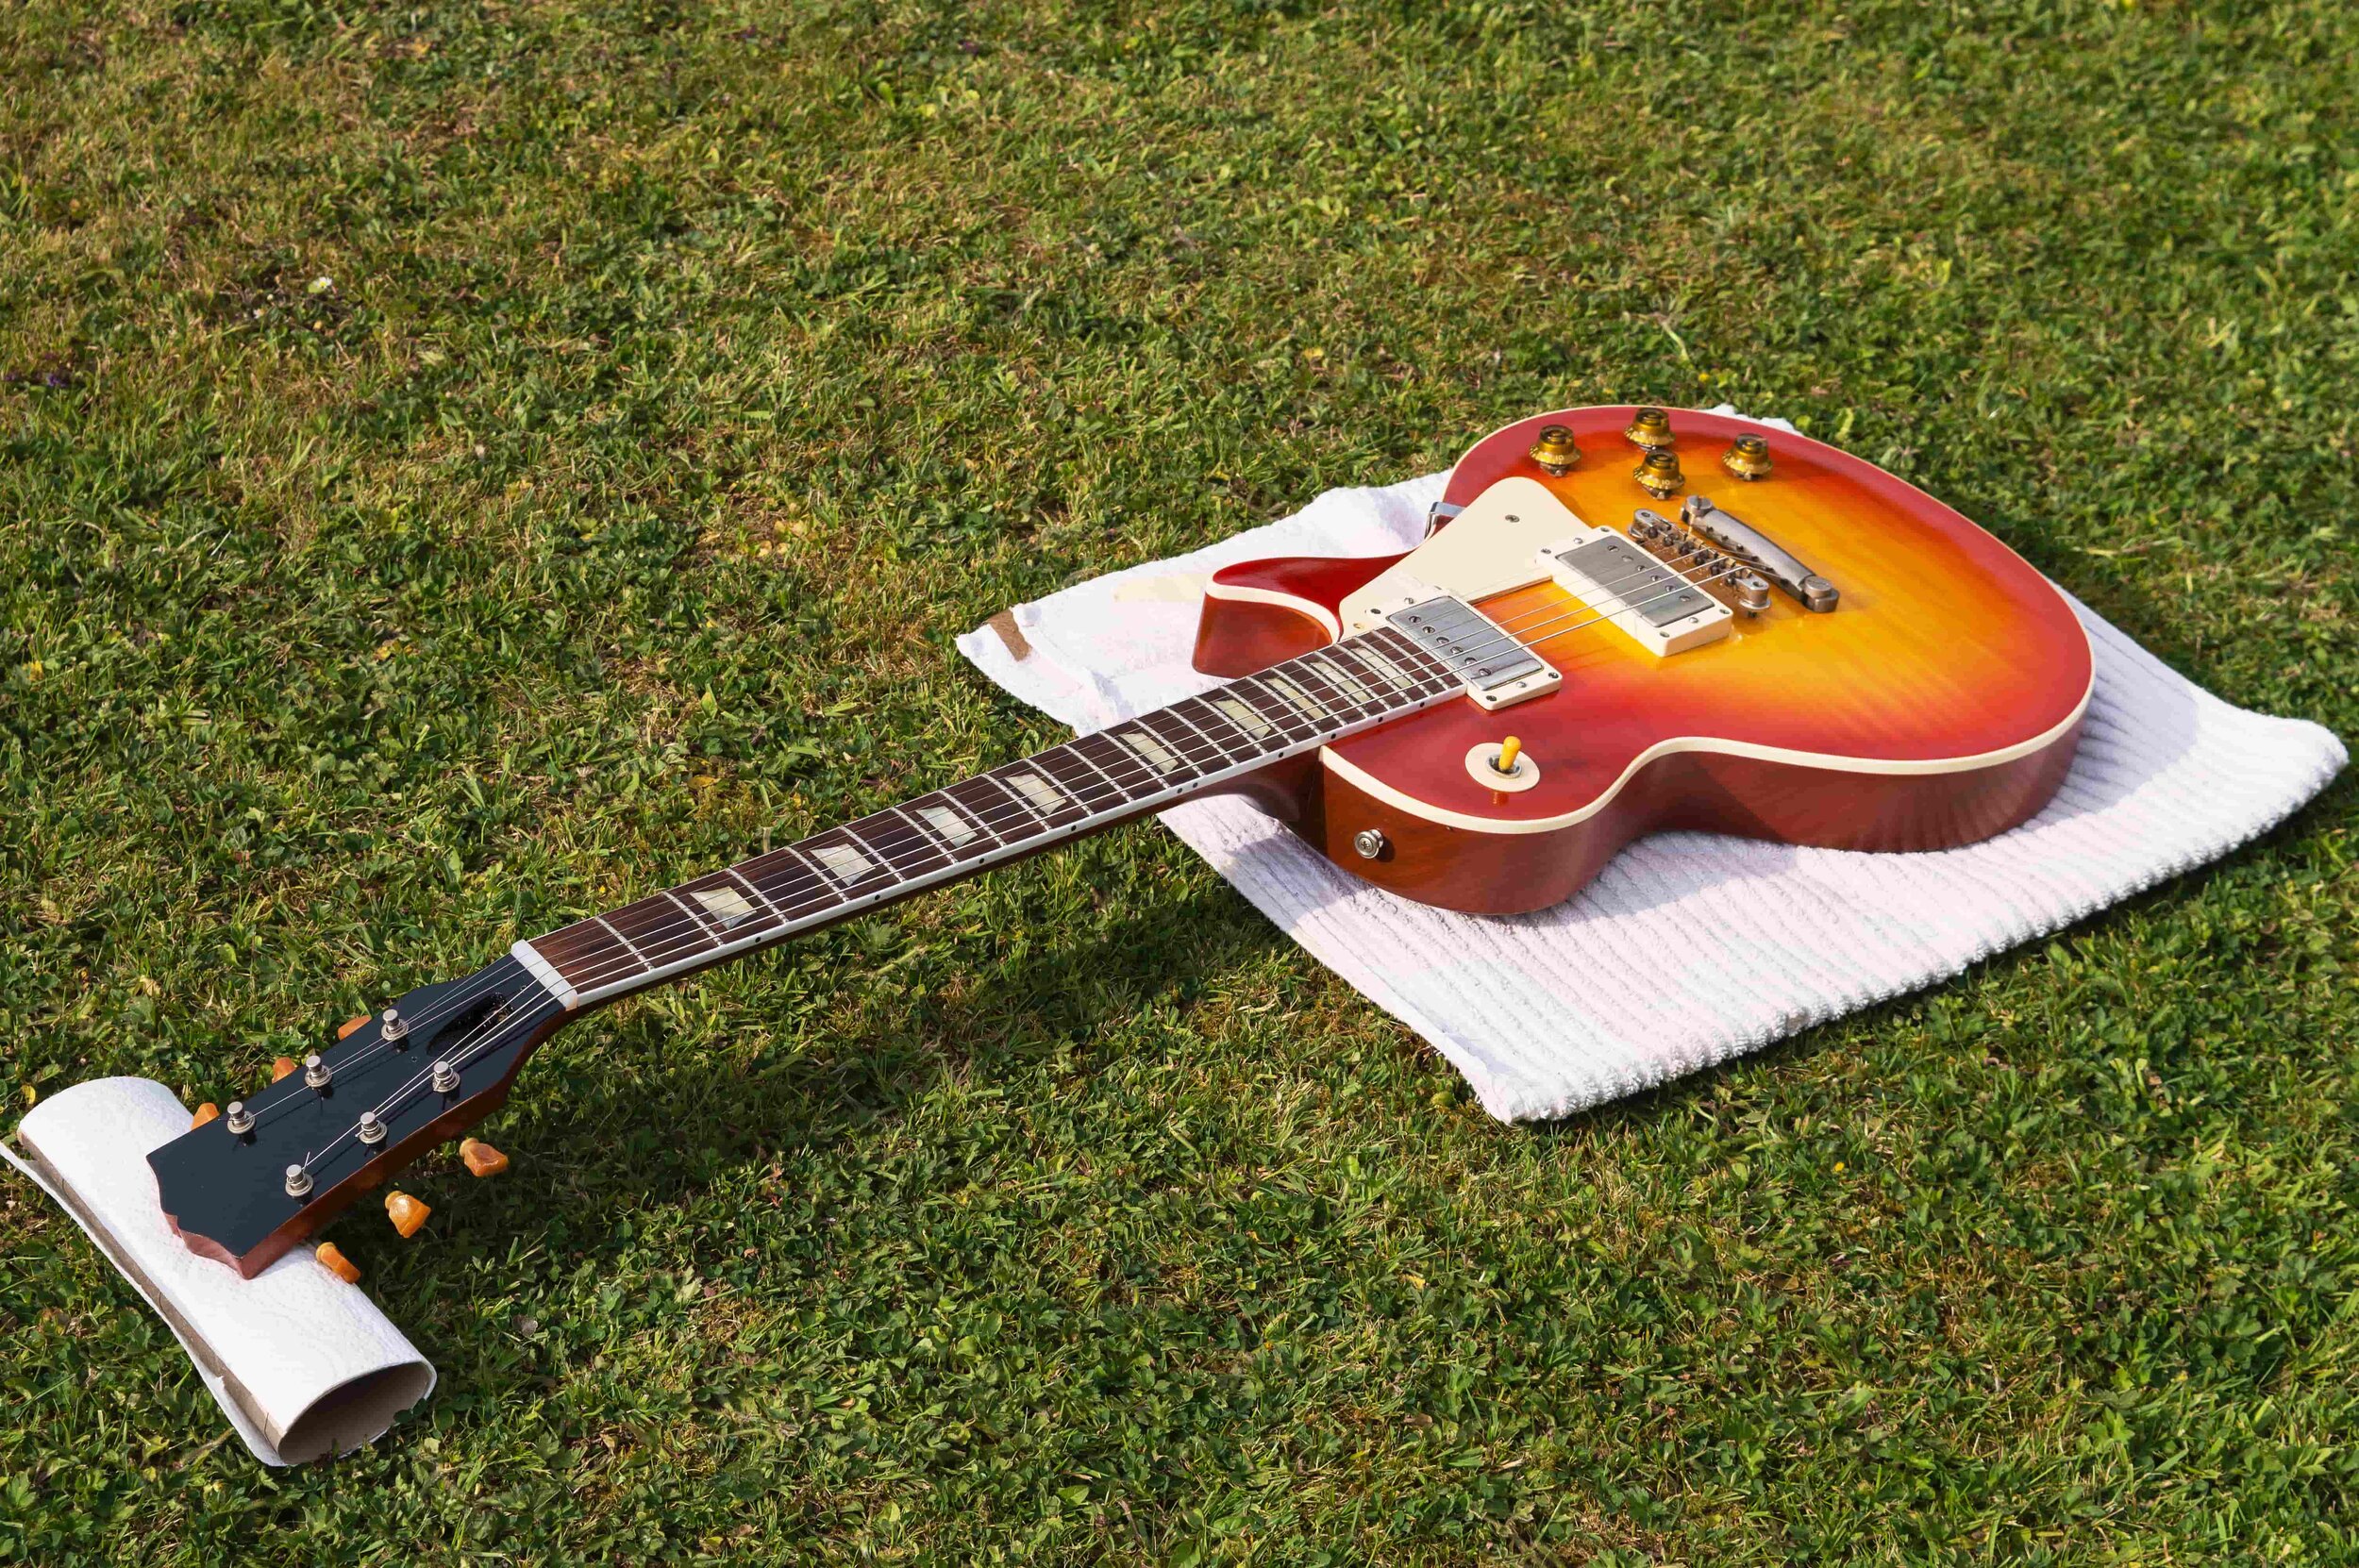
Reassembling the guitar before spraying the tinted clear coats allows it to fade quicker and be played during the night.
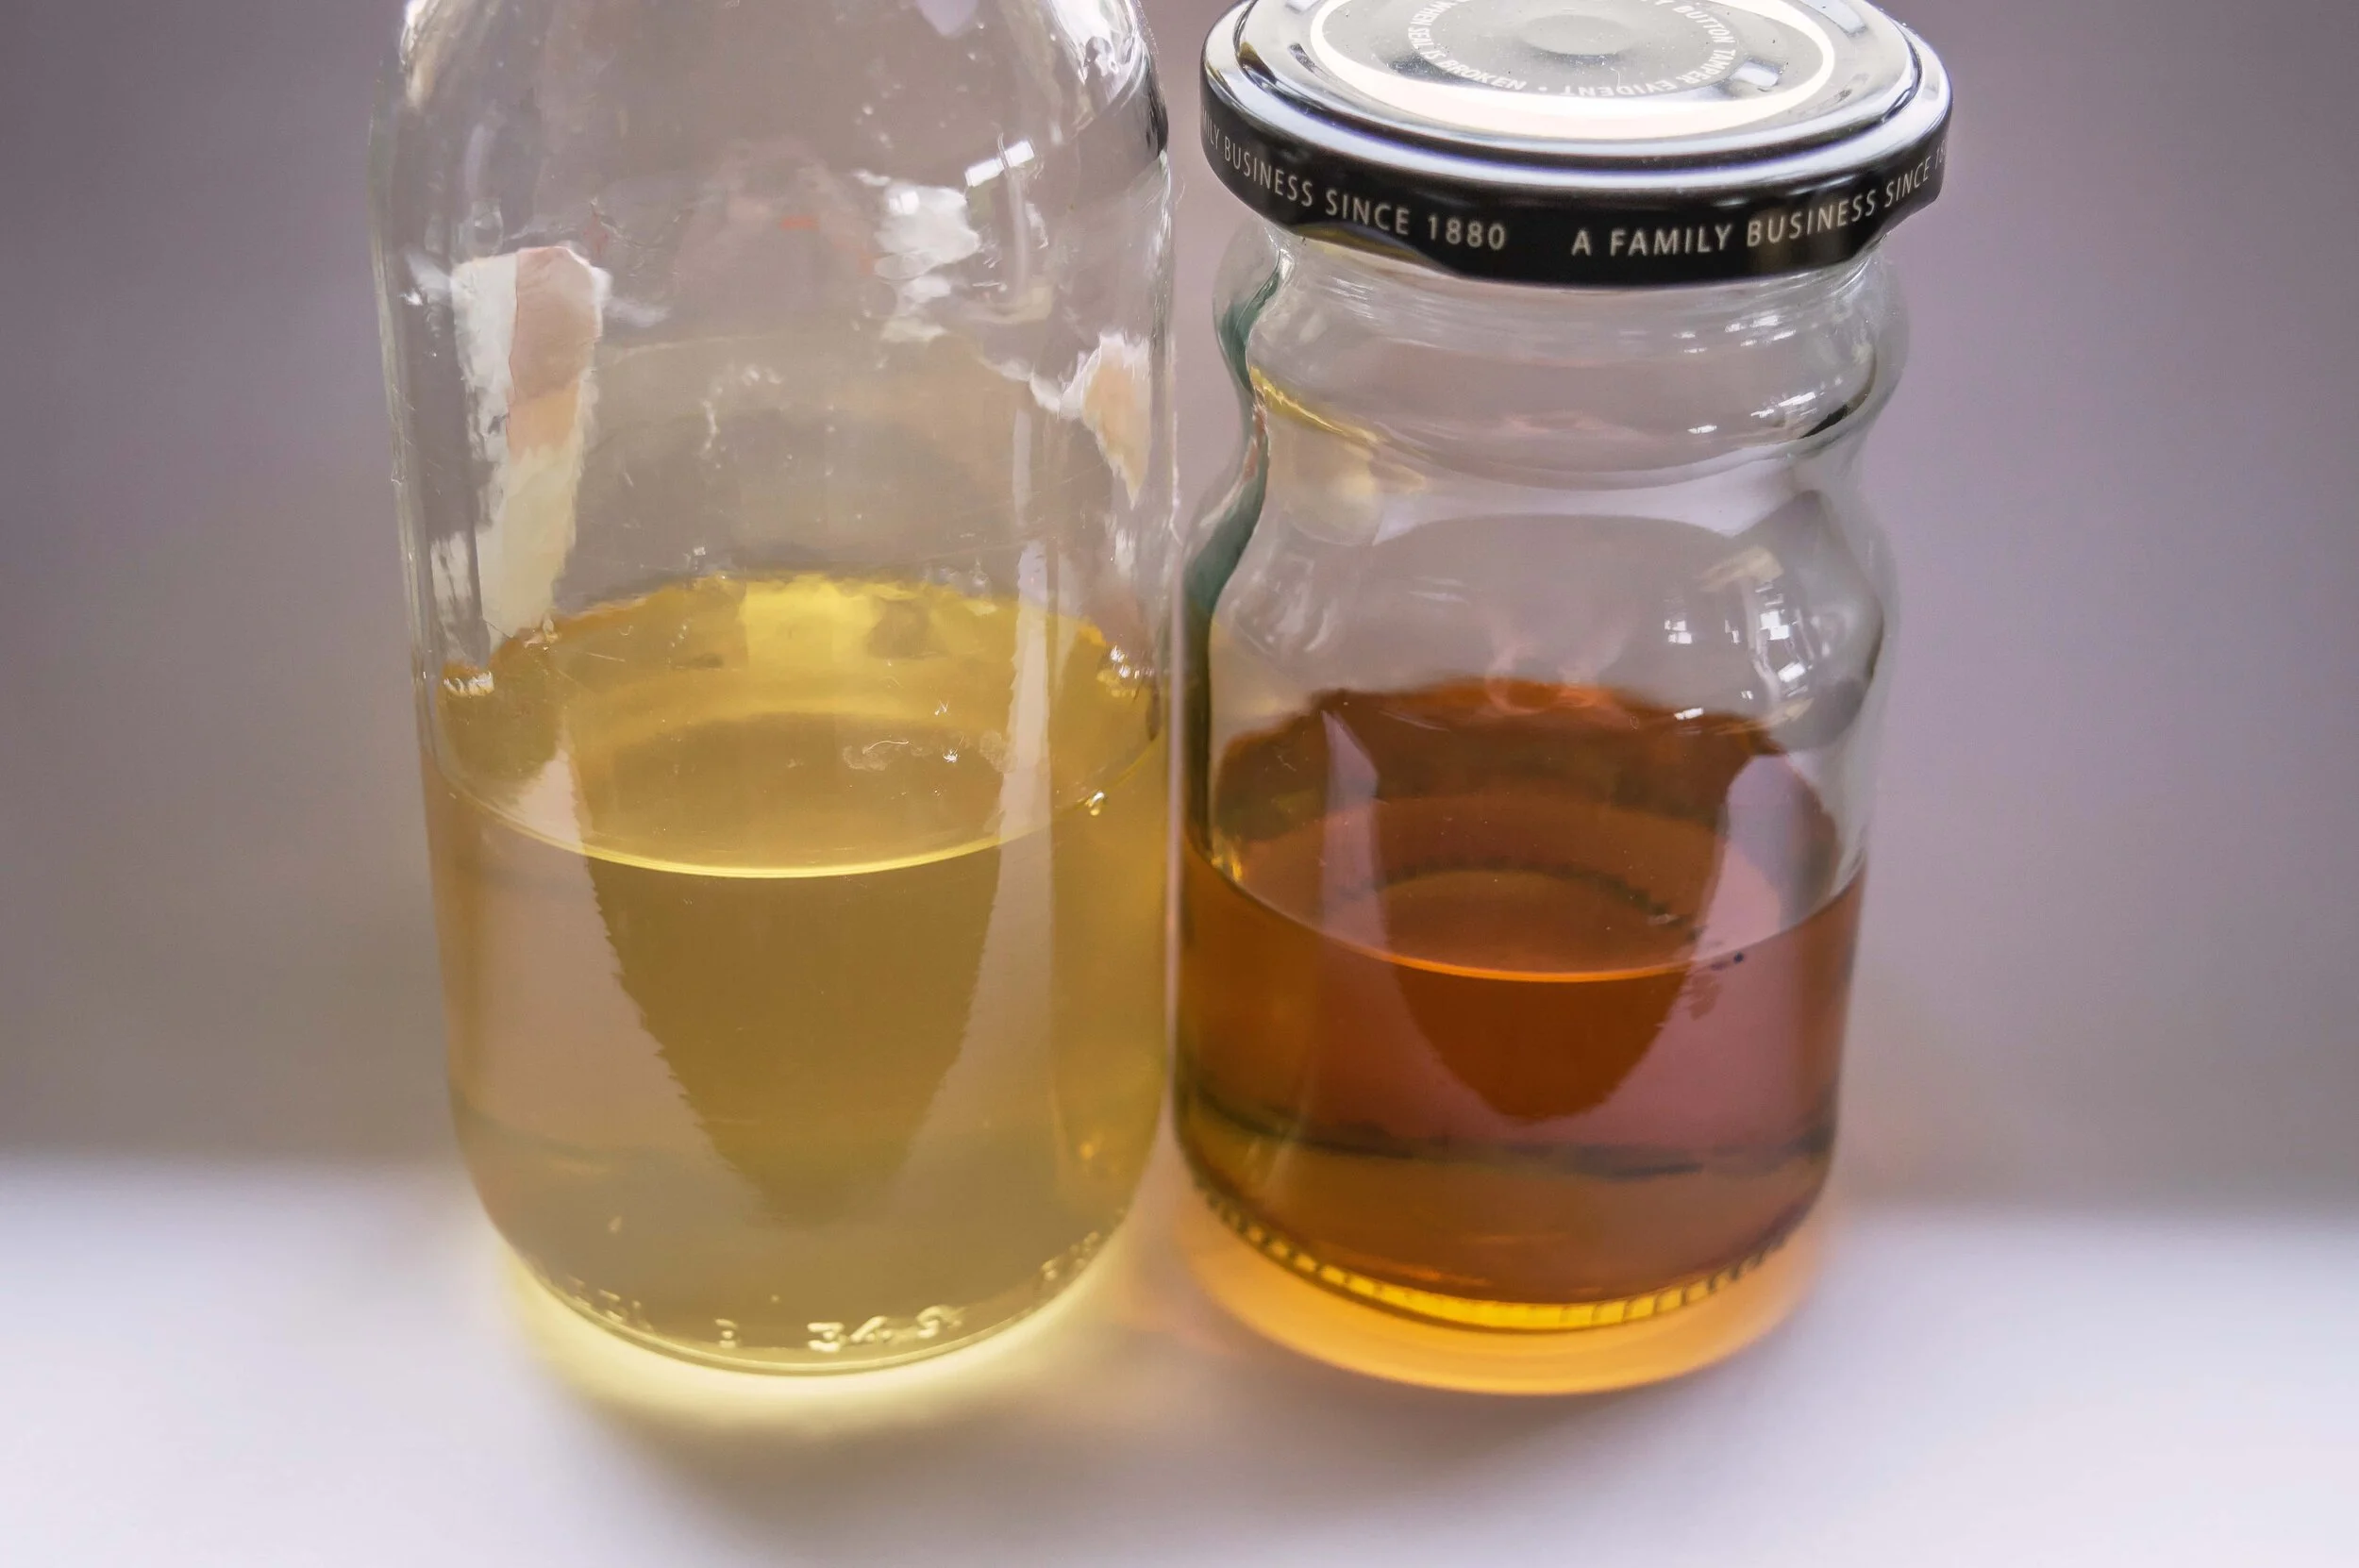
The jar on the left contains ‘clear’ lacquer and the jar on the right contains the same clear lacquer after a week in the sun.
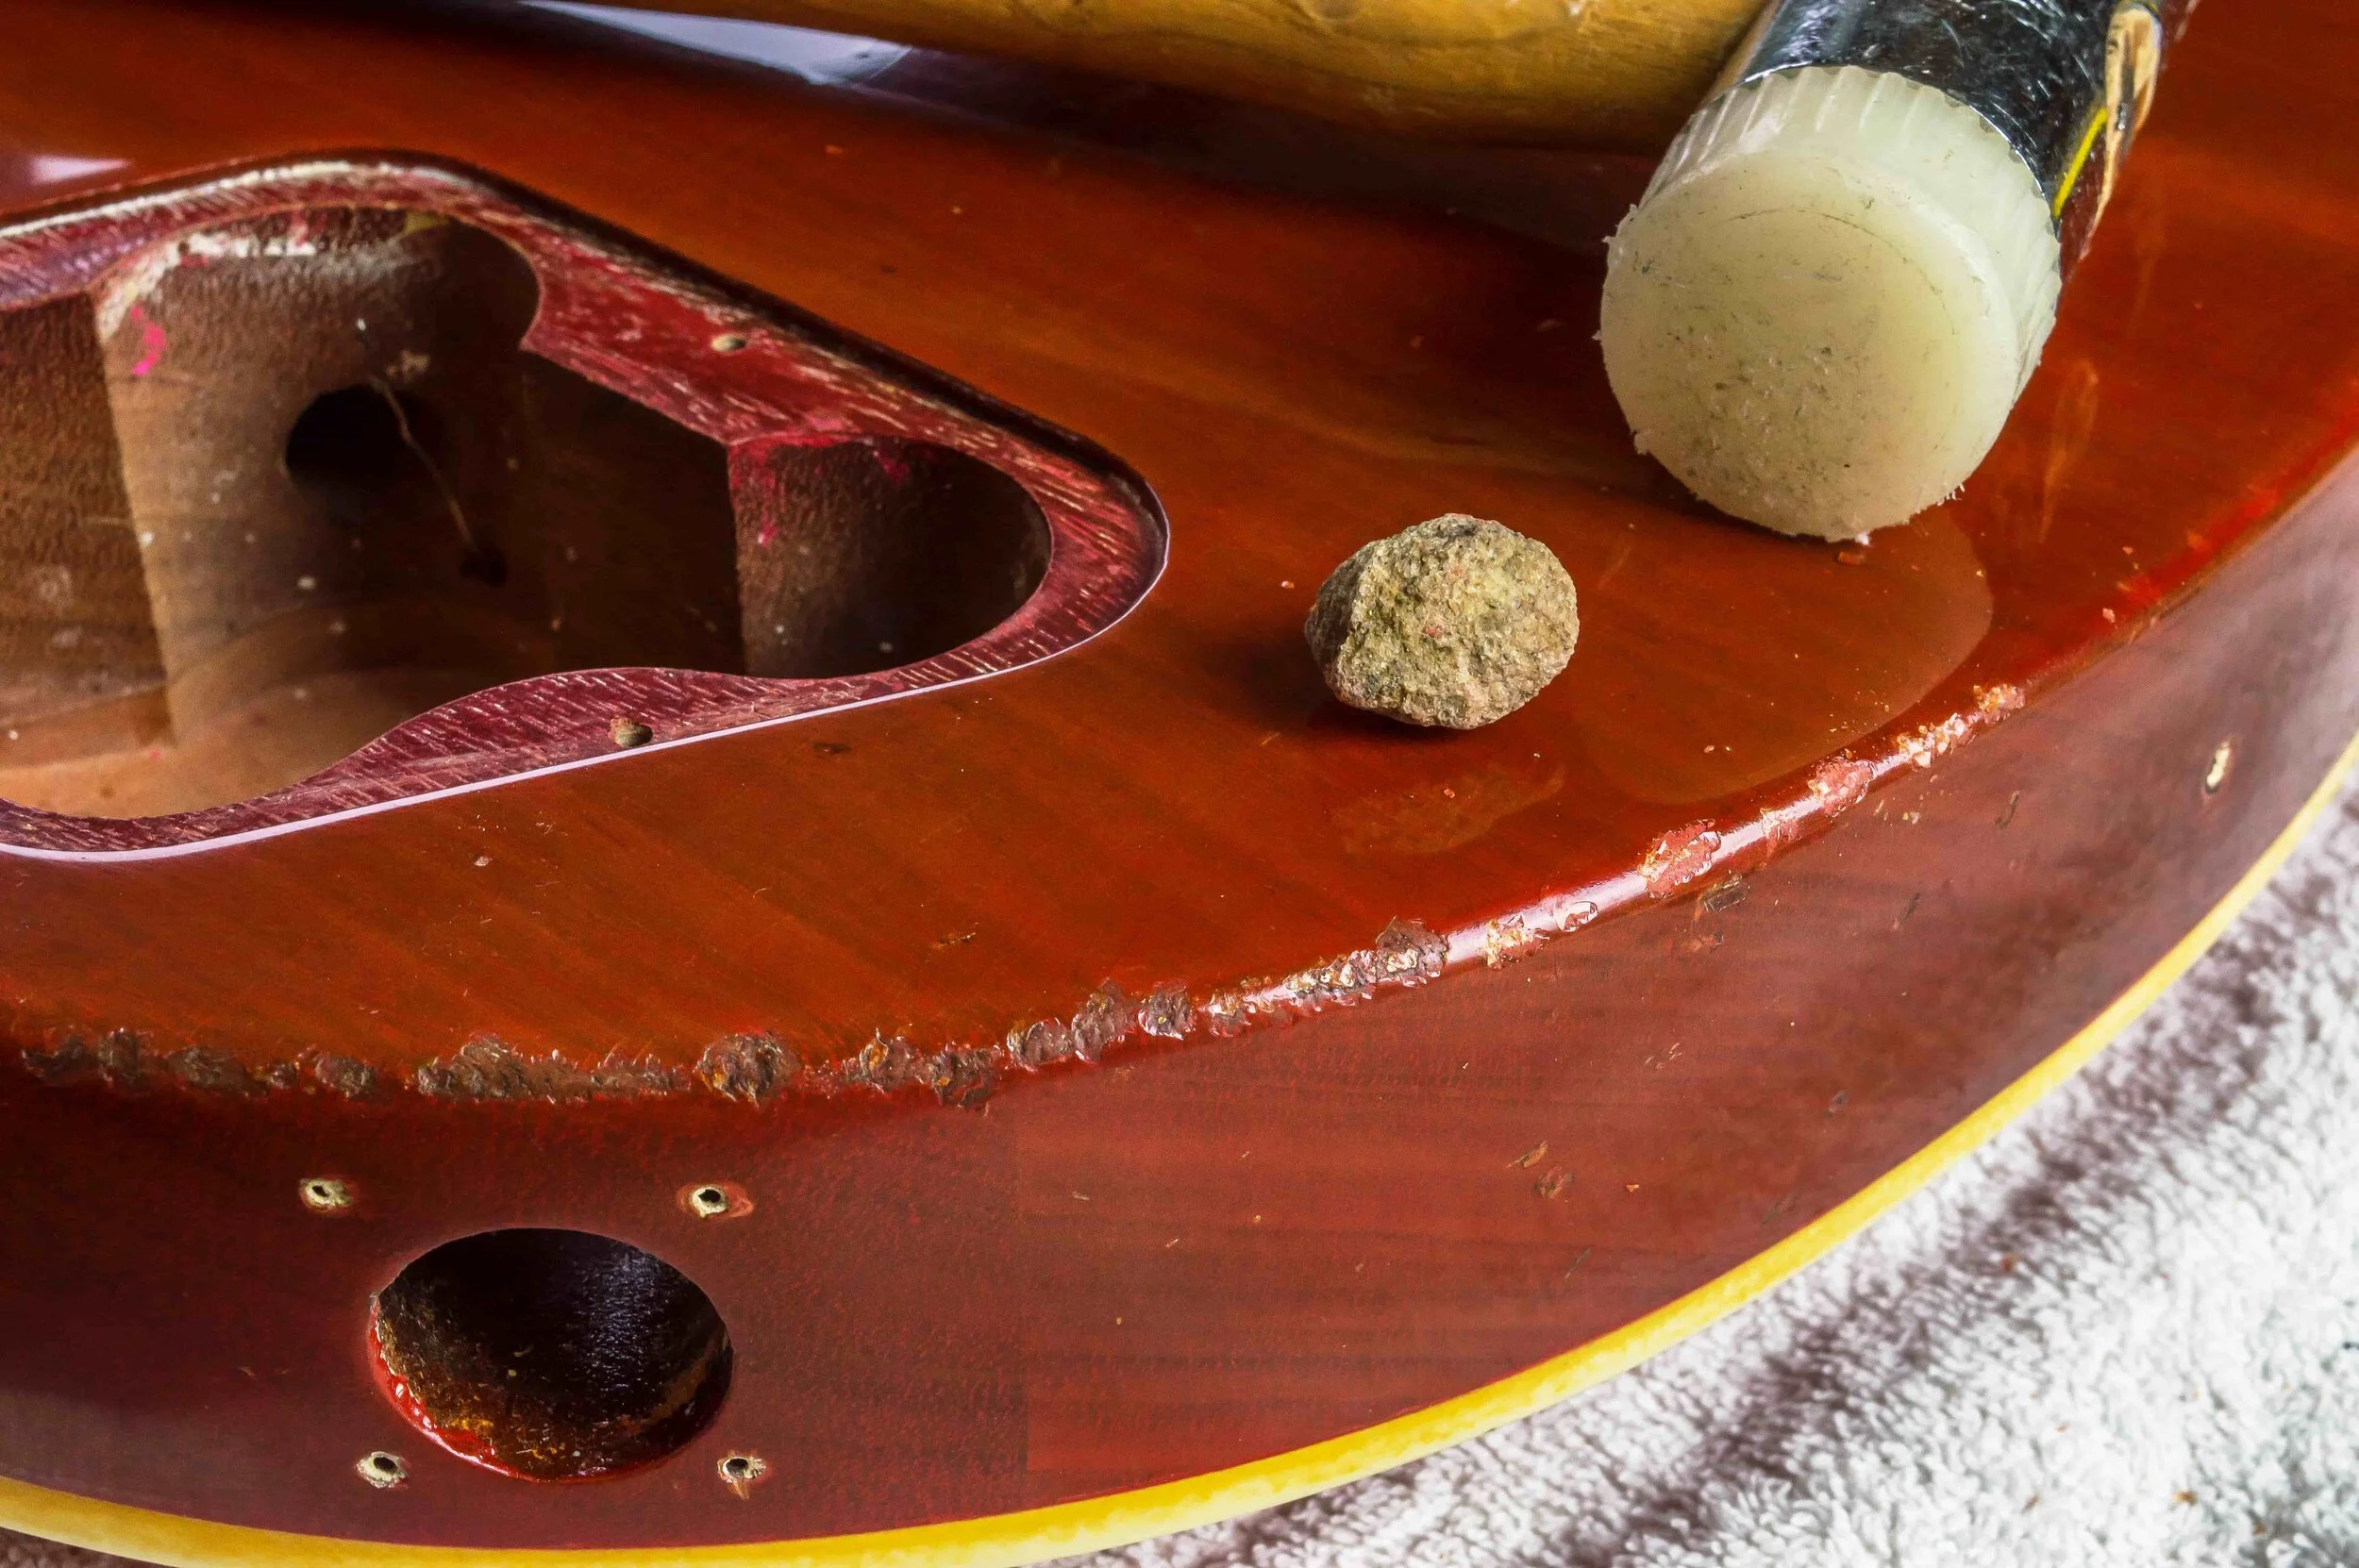
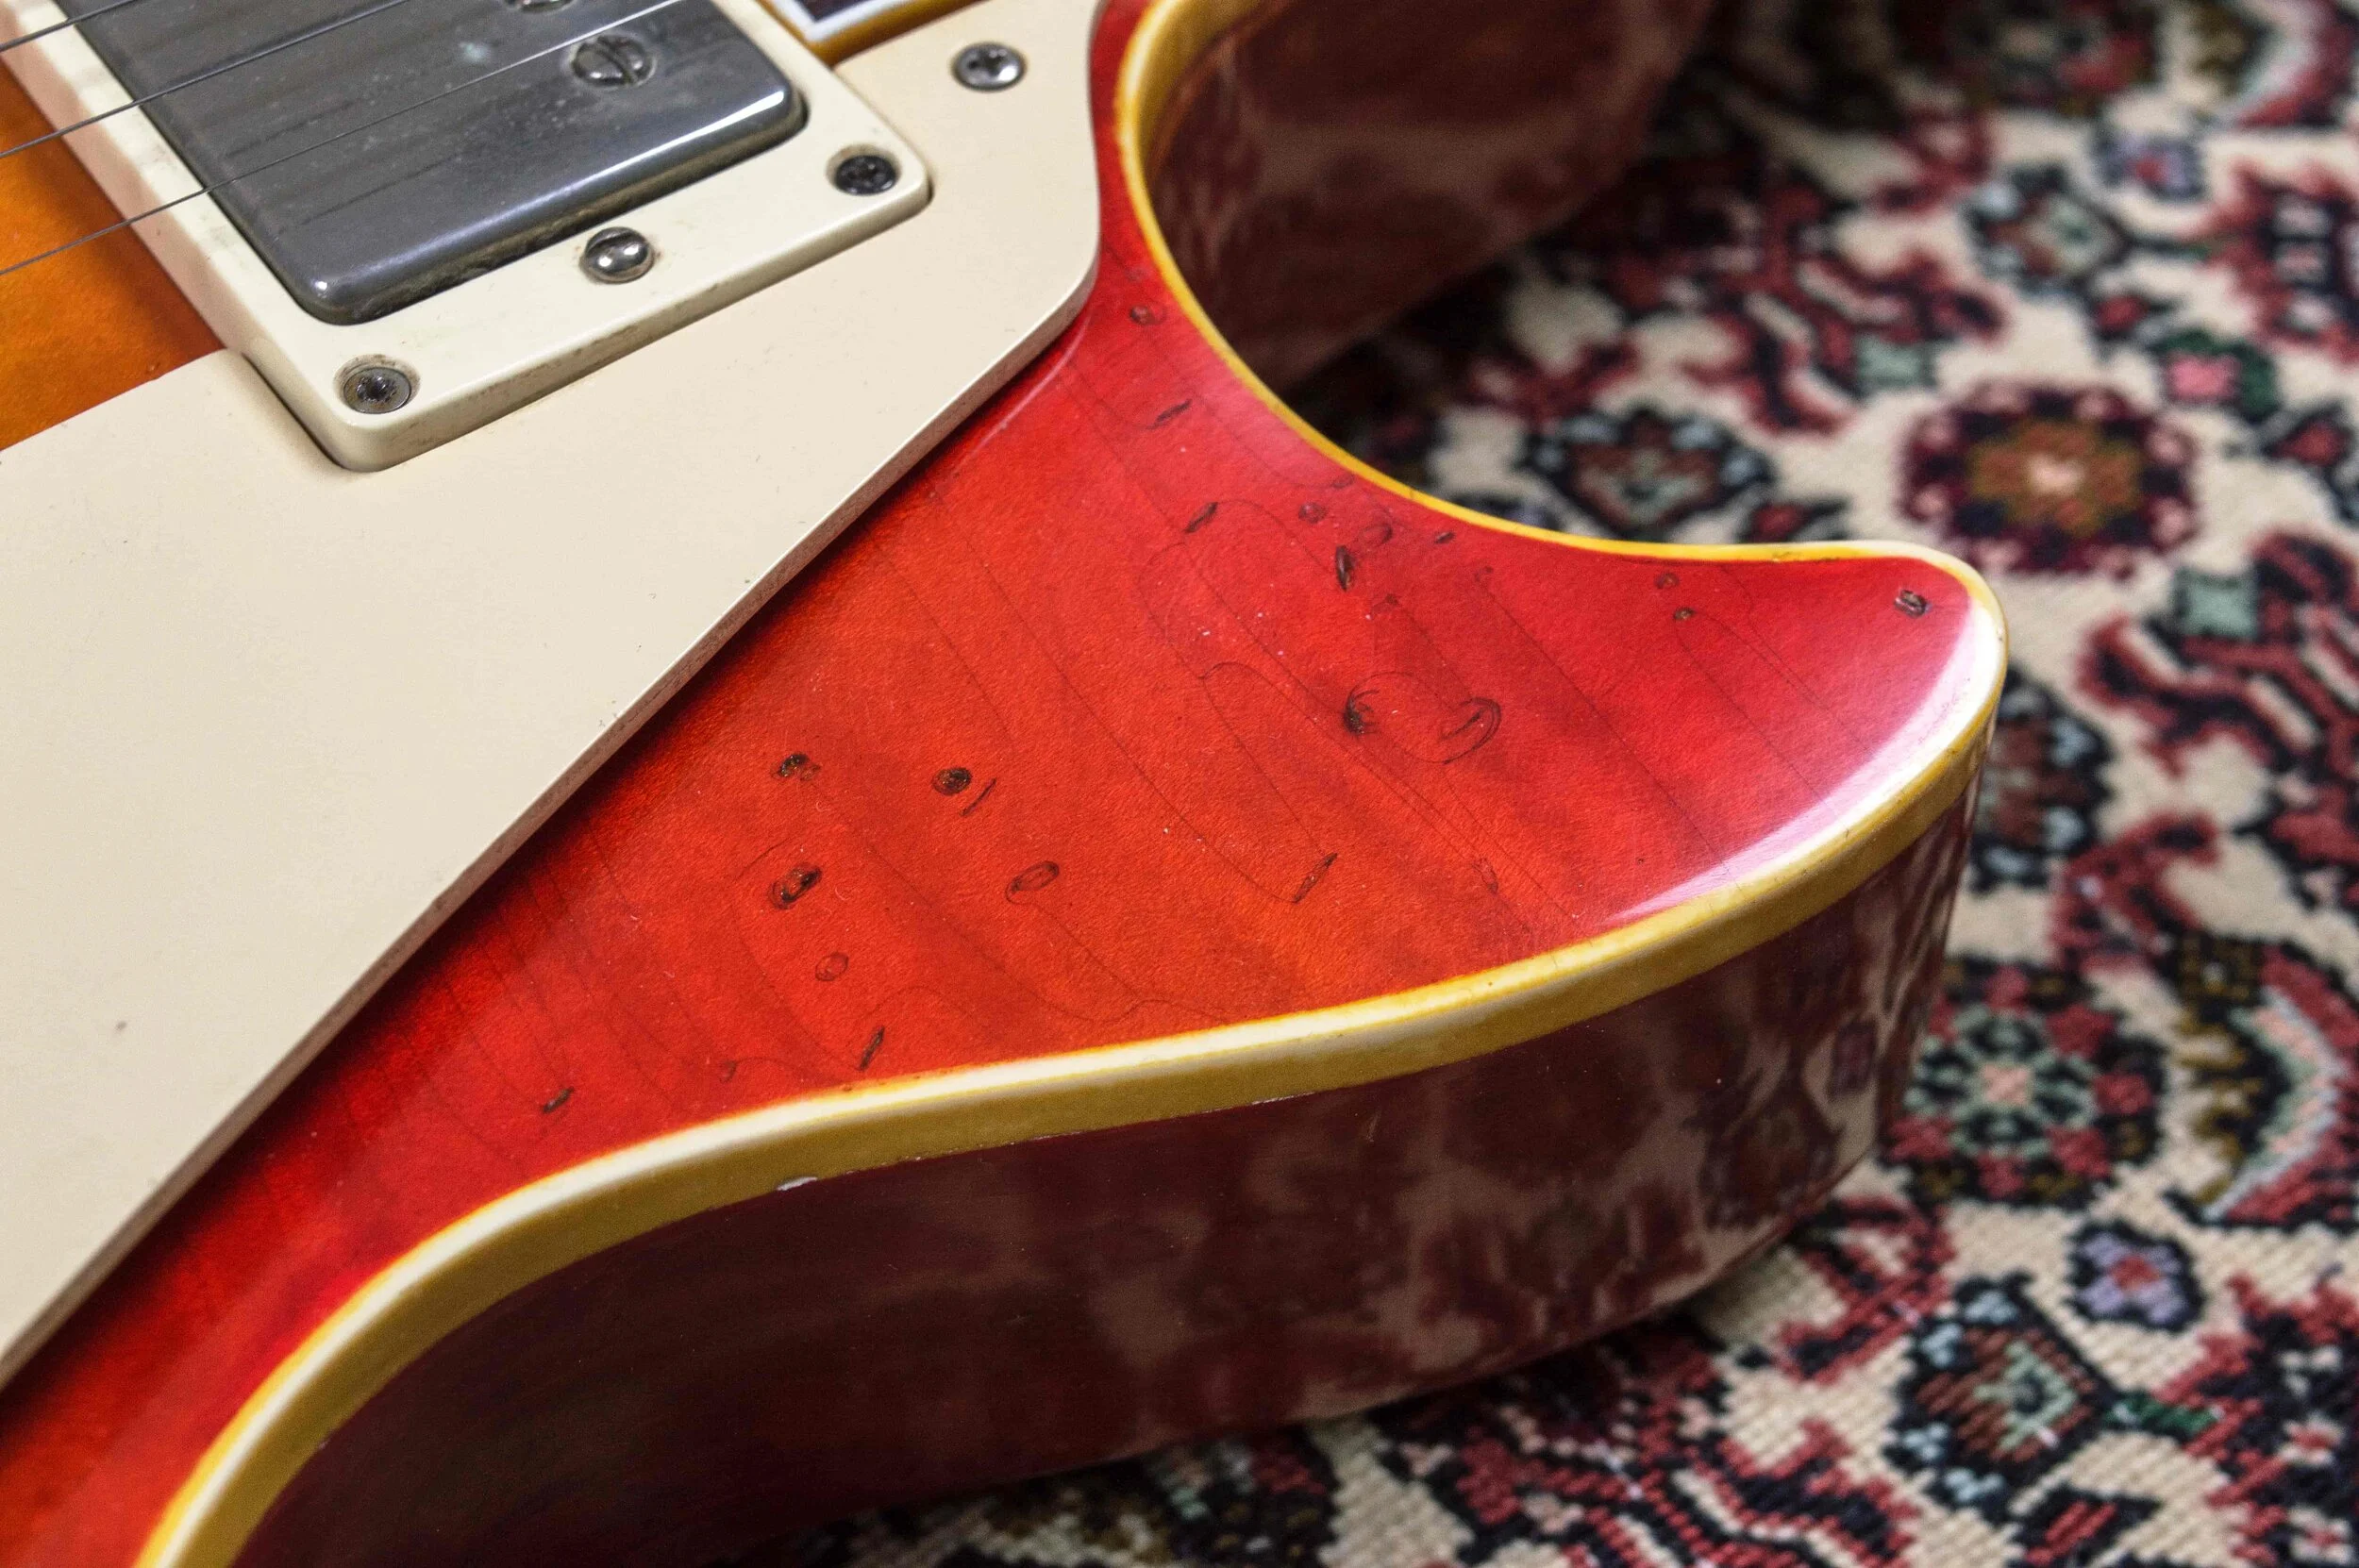
A stone and mallet are used to chip lacquer along the edge of the body and the area on the left has been stained and wax polished.
Having a genuine Burst to use for reference is a massive help, but the chipped areas need wax and stain.
The chipped and relic’d edge combines with visible checking lines and the red grain filler shows through the faded cherry lacquer
Scraping, sanding, staining and buffing the ‘playwear’ area creates a smooth and natural look

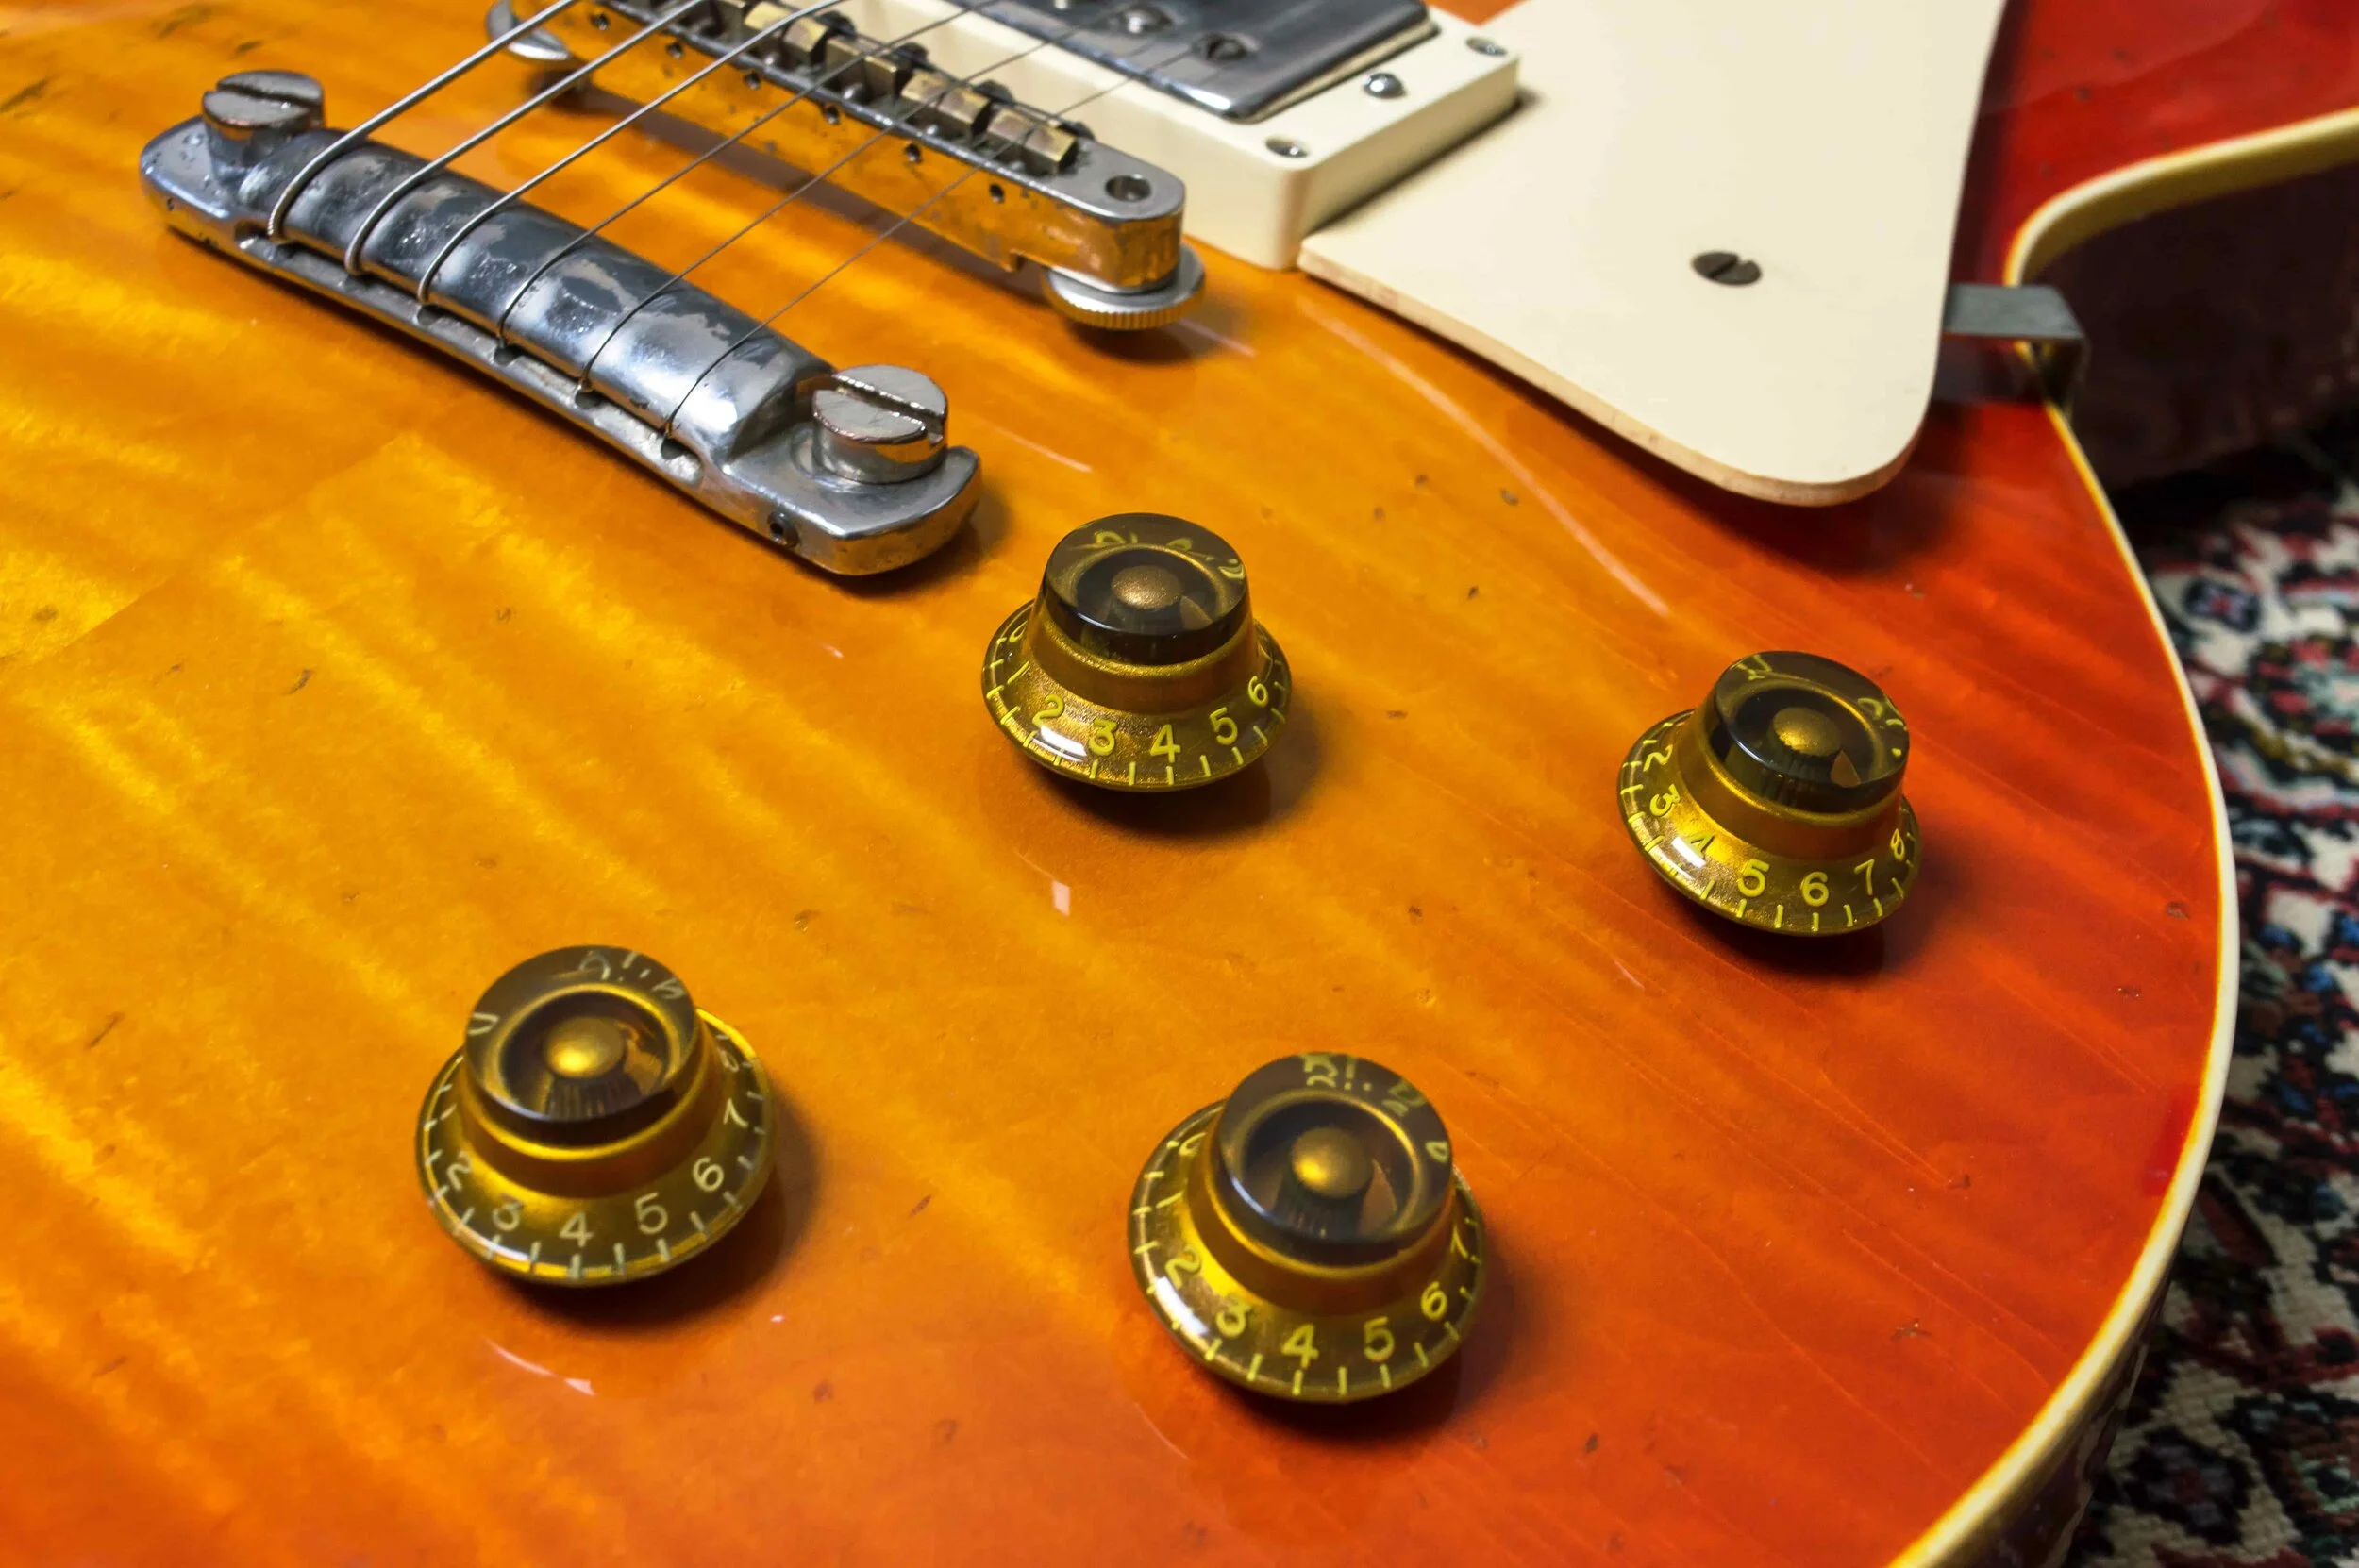
The guitar is ready for reassembly and it’s the last chance to see the unfaded cherry in the poker chip, knob and pickguard areas.
Adding dents and chips to the finish before the body goes into the freezer allows the checking lines to form around them.

The checking lines formed across the body exactly as we had hoped and it’s a lot easier than doing it with a blade.

Just like the real thing, the checking lines’ visibility varies depending on the viewing angle.
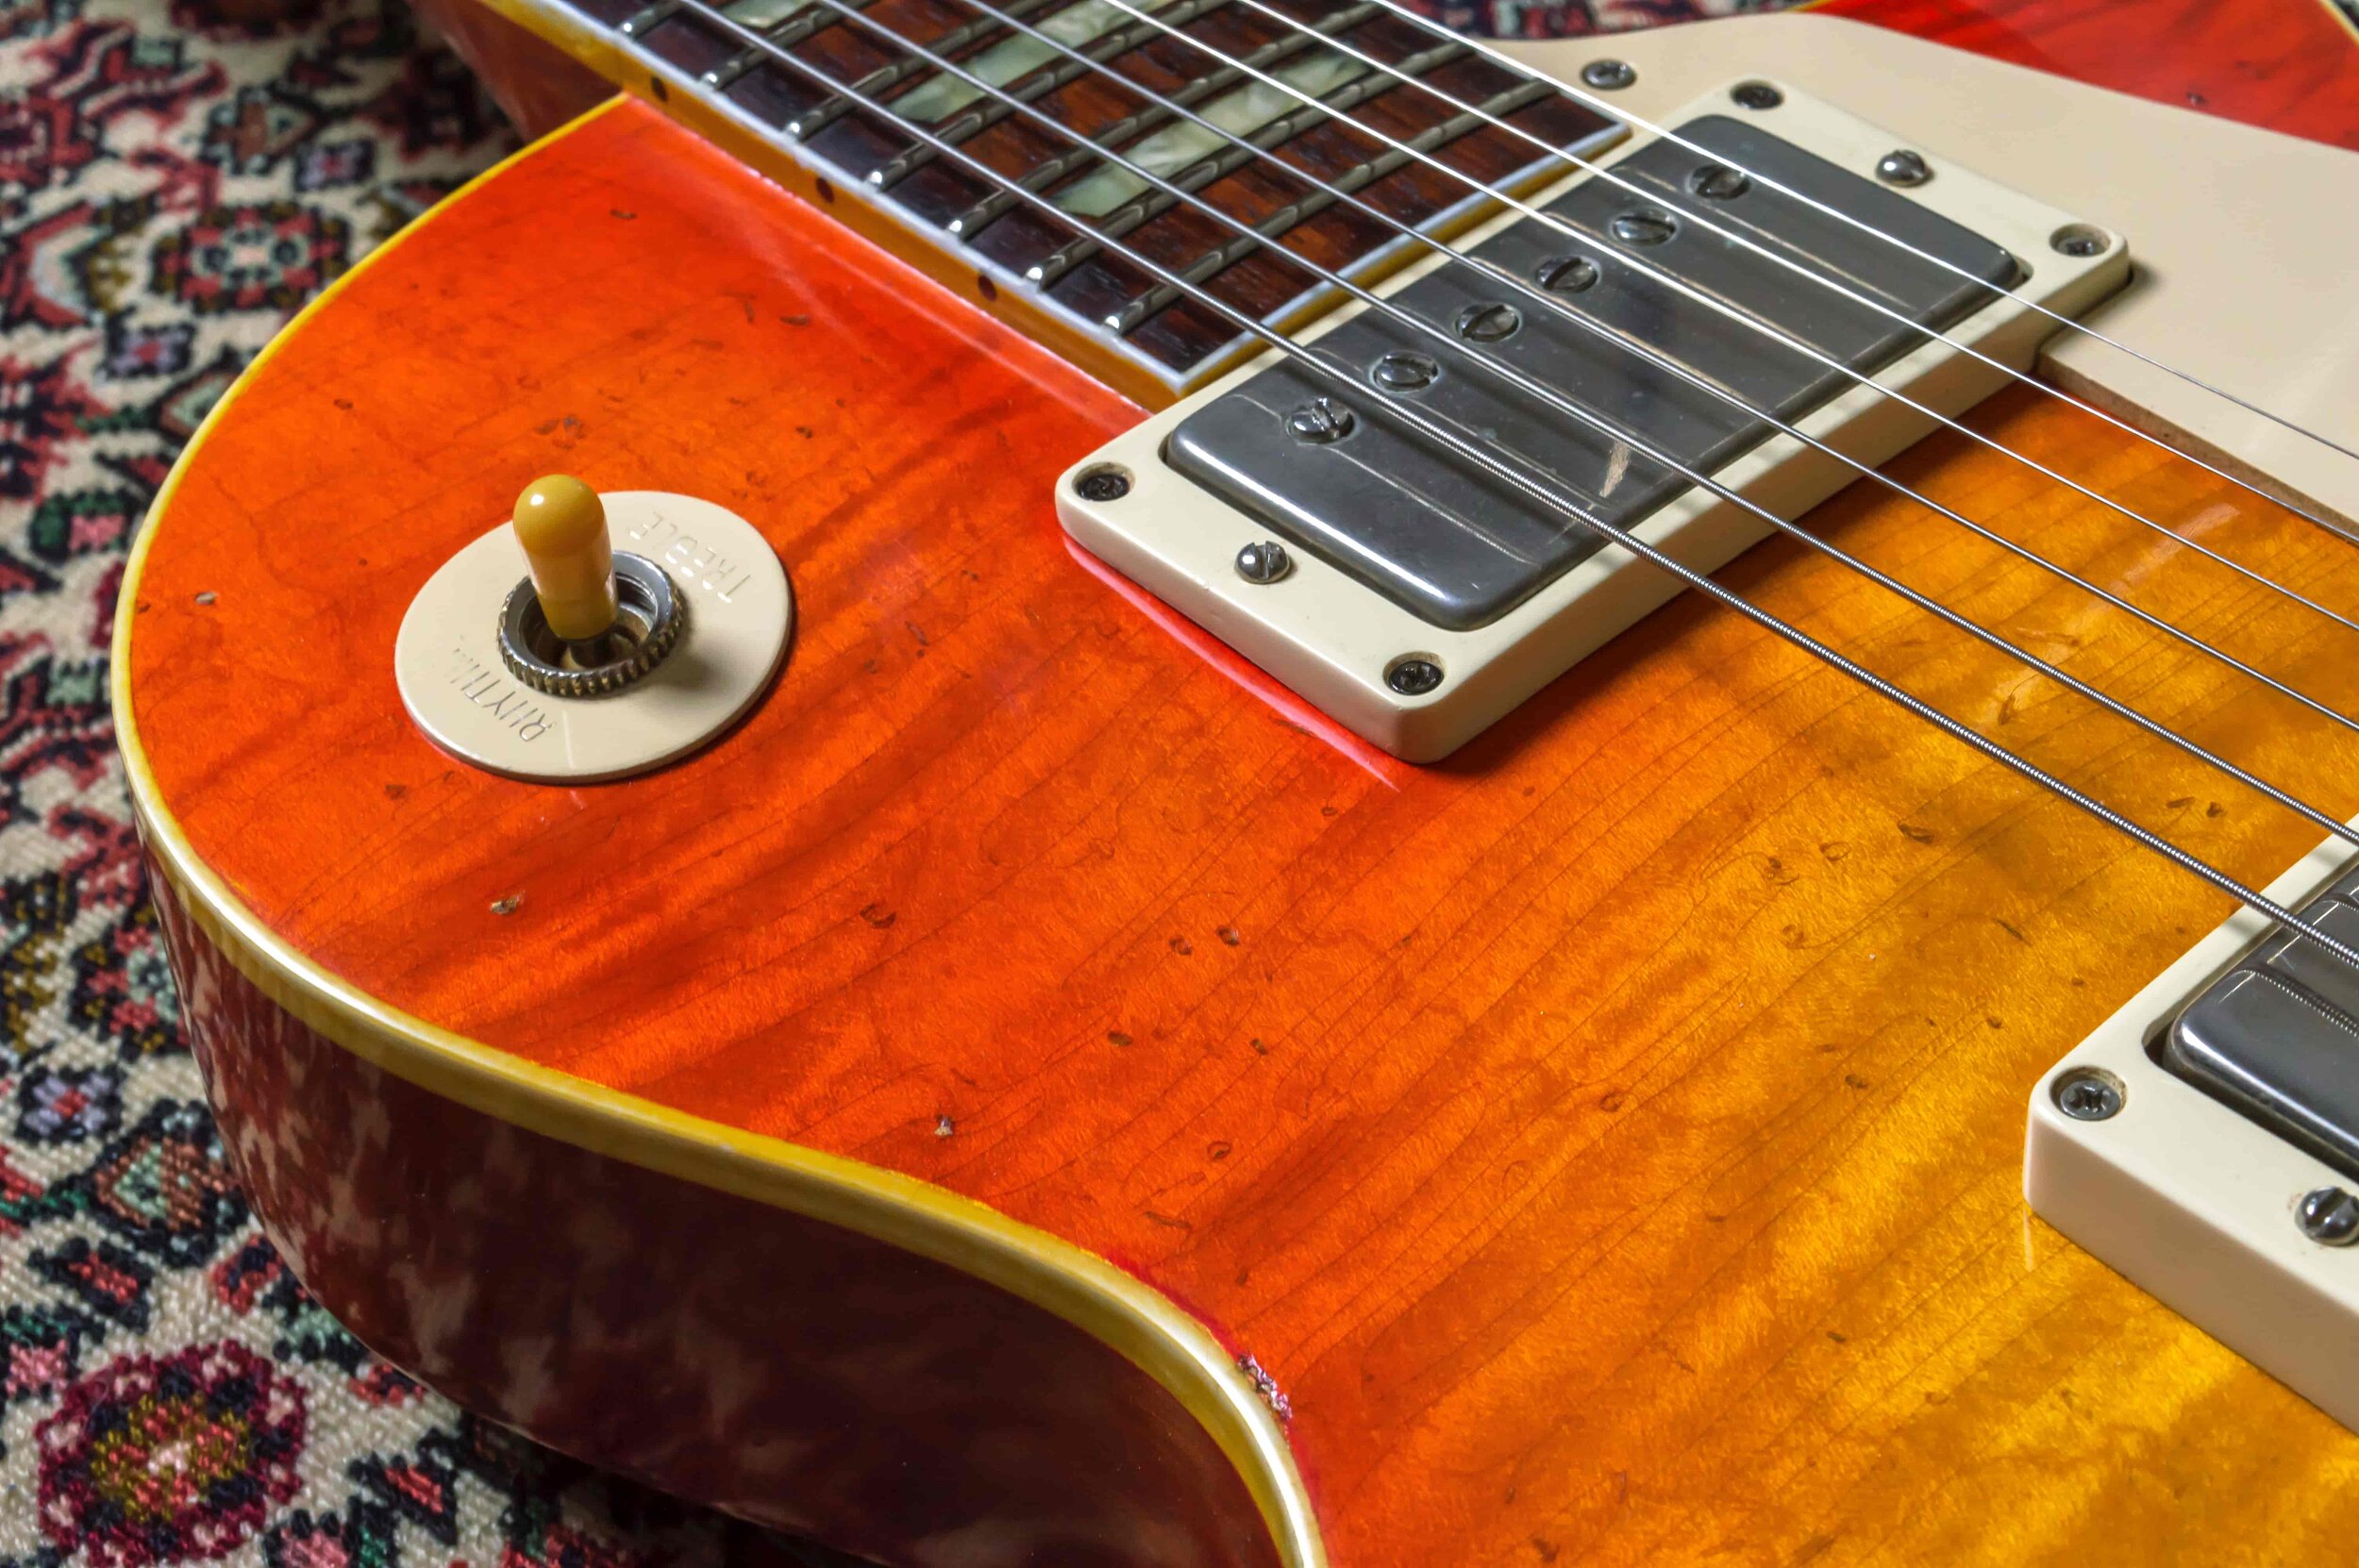
A dark stain has been used to highlight the checking lines in the area around the switch.
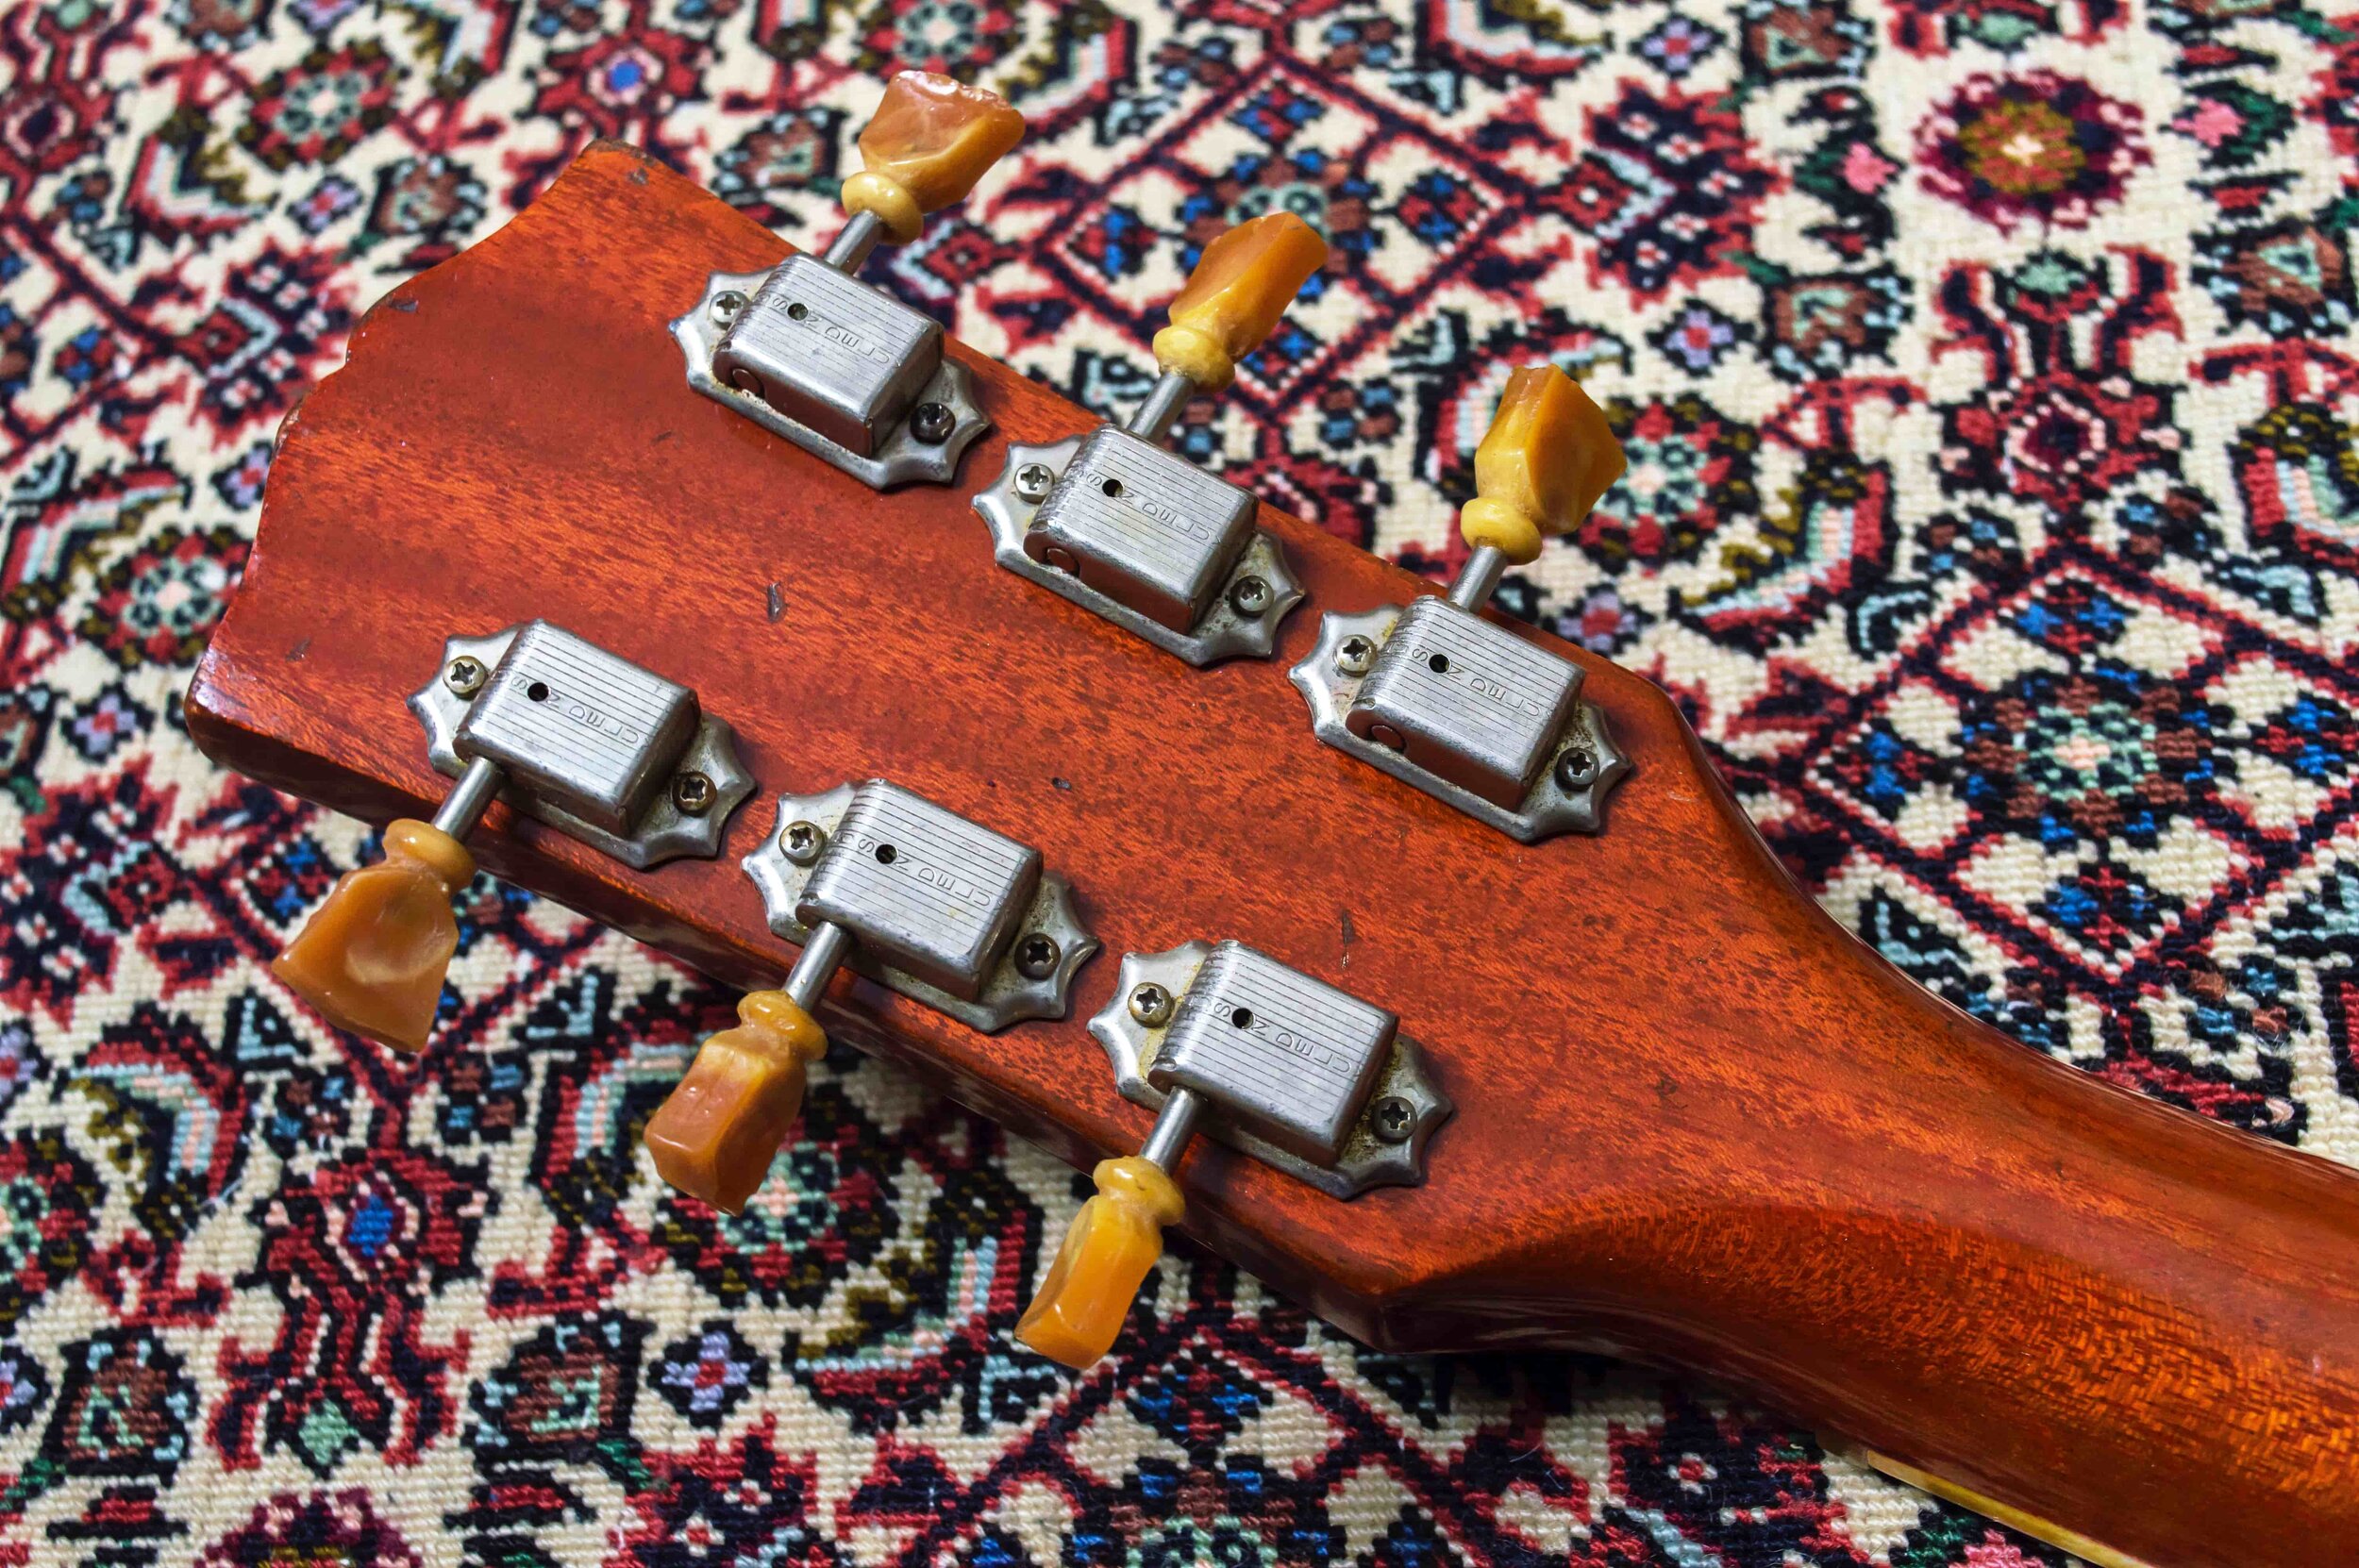
Headstock relicing is minimal, but there’s a lot of very fine lacquer checking that will become more obvious in time.
The finished guitar!

This is my first serious attempt at replicating a late 1950s-style sunburst finish and I am pleased with the outcome. The finish will continue to age naturally and I may decide to do a bit more relic’ing at some point, but for now I’m just going to enjoy playing this guitar again.